SenseVoice is an open-source speech recognition foundation model released by Alibaba. It supports speech recognition in Chinese, Japanese, Korean, and English. Compared to previous models, it features faster recognition speed and higher accuracy.
However, the official release version does not come with timestamp output, which is inconvenient for creating subtitles. Currently, I use other VAD models for pre-segmentation and then use SenseVoice for recognition. I have created this API project and integrated it into video translation software for convenient use.
SenseVoice Official Repository
This API Project: https://github.com/jianchang512/sense-api
Purpose of This Project
- Replace the official
api.pyfile to implement SRT subtitle output with timestamps. - Connect to video translation and dubbing software for use.
- Includes a Windows integration package. You can start the API by double-clicking
run-api.bator launch the browser interface by double-clickingrun-webui.bat.
This
api.pyignores emotion recognition processing and only supports recognition of Chinese, Japanese, Korean, and English speech.
First, Deploy the SenseVoice Project
Deploy using the official source code method, which supports deployment on Windows/Linux/MacOSX. For specific tutorials, refer to the SenseVoice project homepage: https://github.com/FunAudioLLM/SenseVoice. After deployment, download the
api.pyfile from this project and overwrite theapi.pyfile included in the official package (If you want to use it in video translation software, you must overwrite it; otherwise, you will not be able to obtain subtitles with timestamps).Deploy using the Windows integration package, which only supports deployment on Windows 10/11. Download the compressed package from the right side of this page: https://github.com/jianchang512/sense-api/releases. After extracting the package, double-click
run-api.batto use theAPI, or double-clickrun-webui.batto open the web interface.
Using the API
The default API address is http://127.0.0.1:5000/asr
You can open the api.py file to modify it:
HOST='127.0.0.1'
PORT=5000- If you deployed using the official source code, remember to overwrite the
api.pyfile and then executepython api.py. - If you are using the Windows integration package, double-click
run-api.bat. - Wait for the terminal to display the text
http://127.0.0.1:5000, indicating that the startup was successful and you can use it.
Note: The first time you use it, you will download the model from modelscope, which will take a long time.
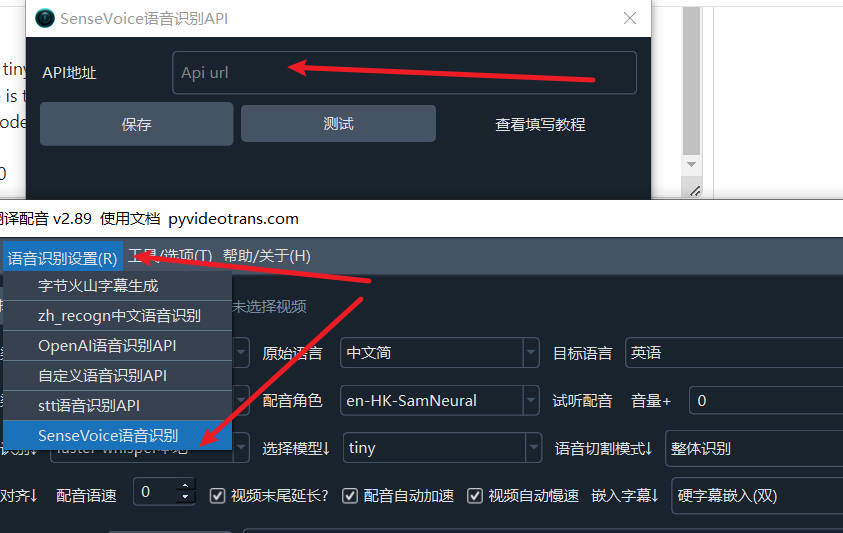
Using it in Video Translation and Dubbing Tools
Fill in the API address in the menu -- Speech Recognition Settings - SenseVoice Speech Recognition window's API address field.
Calling the API in Source Code
- API address: Assuming the default API address is
http://127.0.0.1:5000 - Call method: POST
- Request parameters:
lang: String type, can be one ofzh,ja,ko, oren.file: The audio binary data to be recognized, in WAV format.
- Response returned:
- Successful recognition returns:
{code:0,msg:ok,data:"Complete SRT subtitle format string"} - Failed recognition returns:
{code:1,msg:"Reason for error"} - Other internal errors return:
{detail:"Error information"}
- Successful recognition returns:
Example: To recognize the 10.wav audio file, where the spoken language is Chinese.
import requests

res = requests.post(
    f"http://127.0.0.1:5000/asr",
    files={"file": open("c:/users/c1/videos/10s.wav", 'rb')},
    data={"lang": "zh"},
    timeout=7200,
)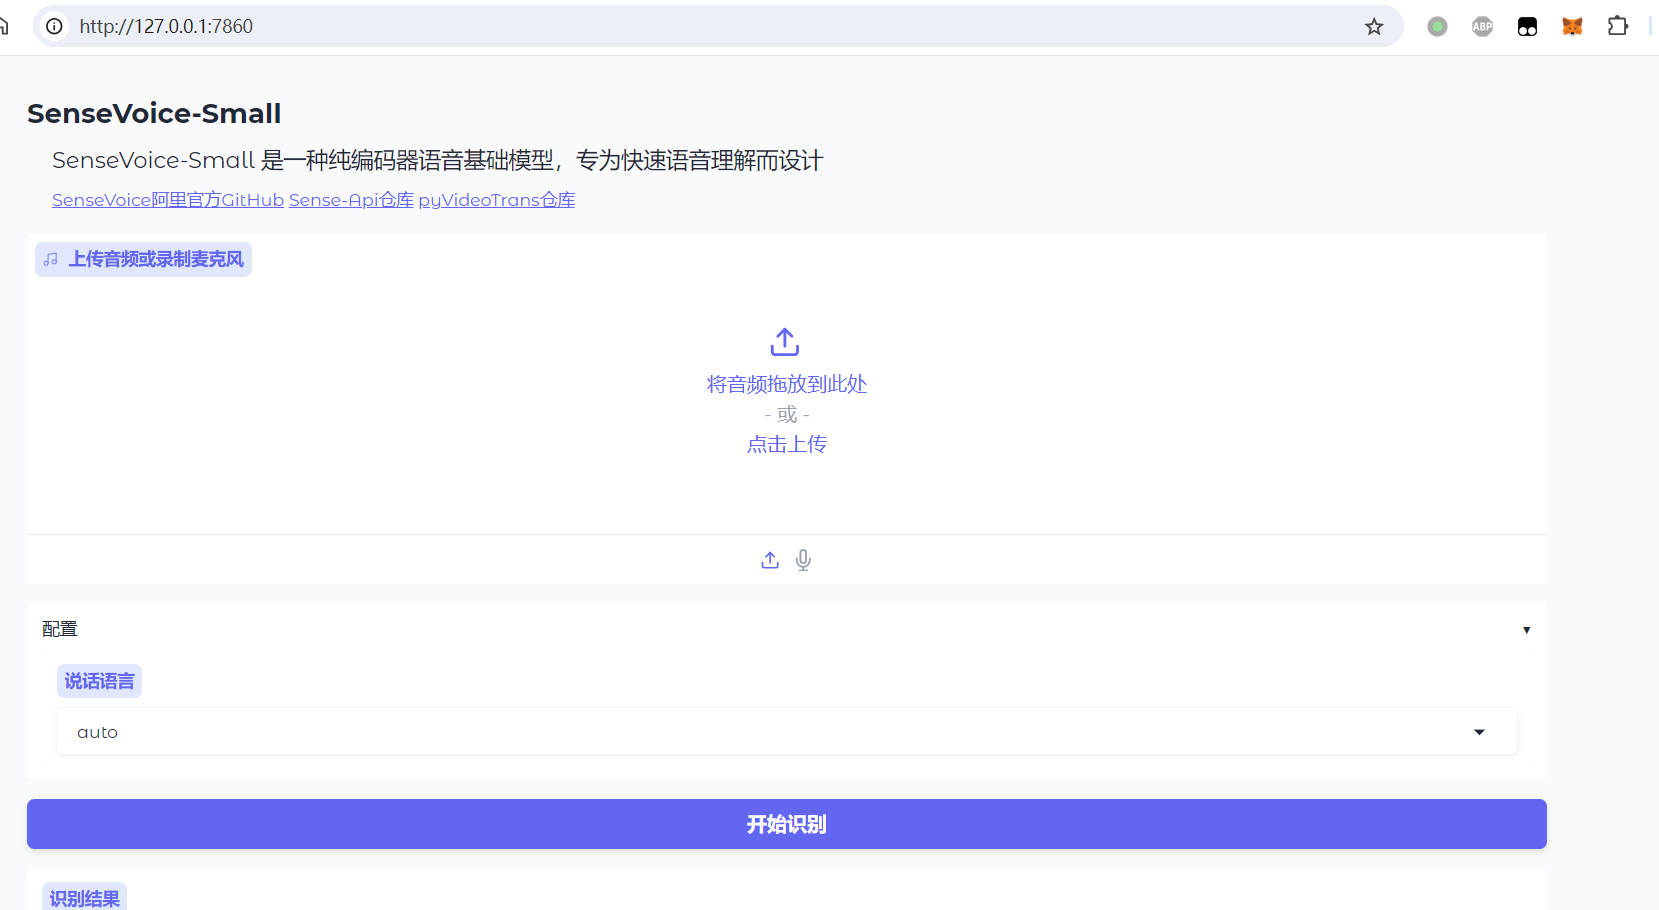
print(res.json())Using WebUI in a Browser
- If you deployed the official package using the source code, execute
python webui.py. When the terminal displayshttp://127.0.0.1:7860, enter that address in your browser to use it. - If you are using the Windows integration package, double-click
run-webui.bat. After the startup is successful, the browser will open automatically.