Using Qwen-TTS on Google Colab
Recently, Alibaba's open-source Qwen-TTS (Qwen3-TTS) has taken the AI voice world by storm. With its natural voice, emotional richness, and impressive voice cloning abilities, many people want to give it a try.
Aside from local deployment, you can also use Google's cloud GPU for free. It's completely free, requires no local GPU, and needs no environment setup. All you need is a browser to run Qwen-TTS online and enjoy voice cloning!
Preparation
Before you start, you'll need two things:
- A Google account
- A VPN or proxy (Since Colab is a Google service, accessing it from mainland China requires a VPN).
Once you have these, let's get started!
Step 1: Open the "Cloud Computer"
First, click the link below to open the pre-configured notebook:
🔗 Copy this address and open the Qwen-TTS cloud notebook in your browser: https://colab.research.google.com/gist/jianchang512/3be479157d50c4ccd2de73c146e80245/qwentts-demo.ipynb
Once opened, you'll see an interface that looks like code. Don't worry, we just need to click a few buttons.
Step 2: Enable GPU Acceleration
Google Colab is essentially a free "cloud computer" Google lends us. To run AI, we need to equip this computer with a "graphics card."
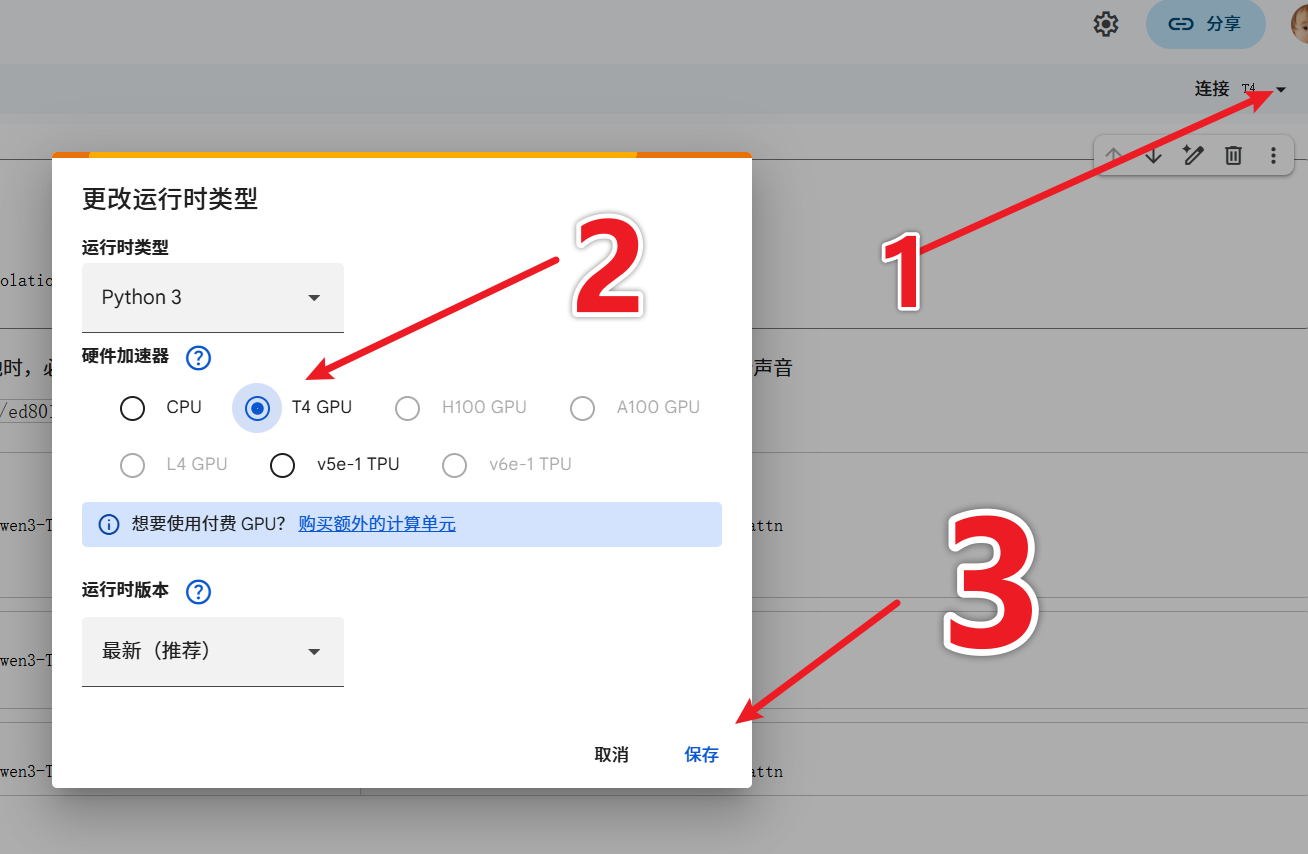
- In the top-right corner (or menu bar), click "Connect" or "Change runtime type."
- In the pop-up window, Hardware accelerator must be set to 【T4 GPU】.
- Click Save.
Step 3: One-Click Environment Setup
After setting up the GPU, let's install the required software for Qwen-TTS.
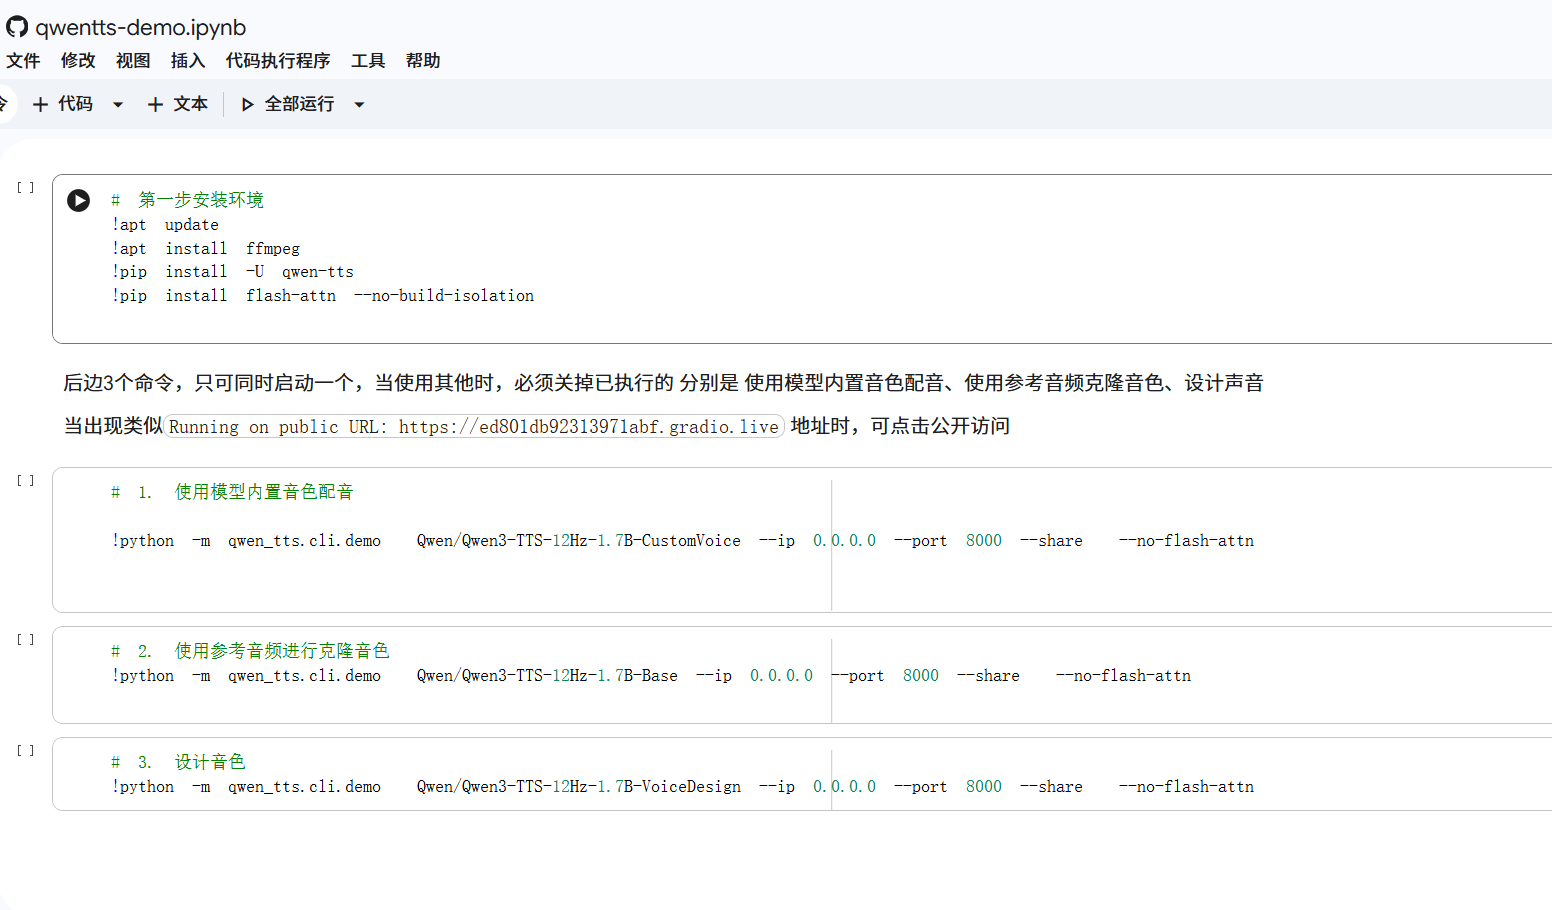
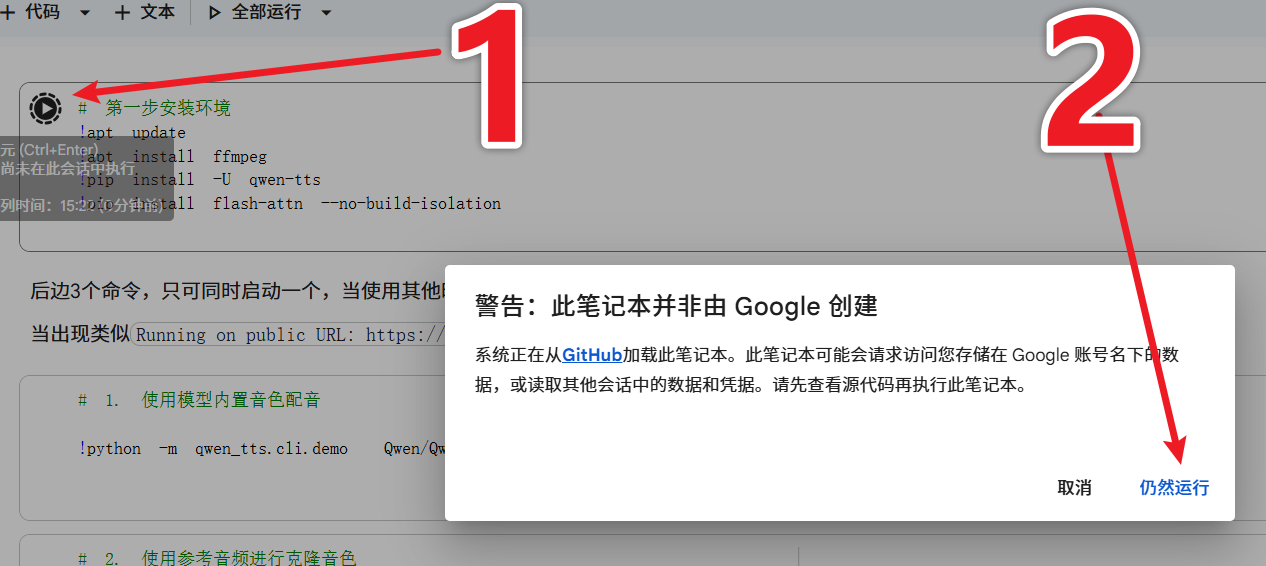
- Find the top code block titled "# Step 1: Set up environment."
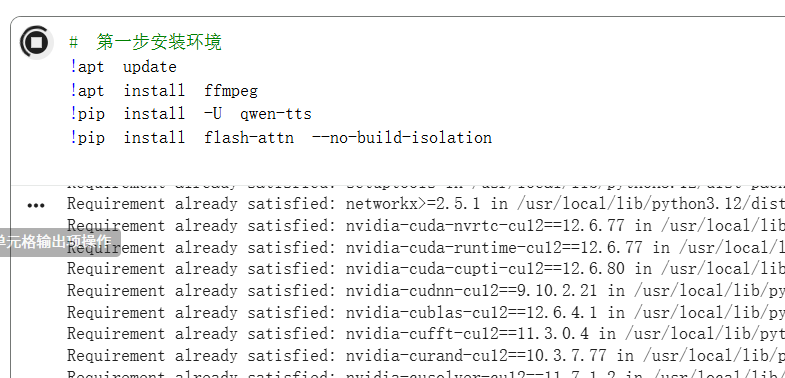
- Hover over the left side of the code block and click the "Play button ▶️" that appears.
The system will automatically run the commands. Just wait a few minutes until a green checkmark ✅ appears next to the play button, indicating completion.
Step 4: Choose a Mode and Start
Once the environment is set up, scroll down. You'll see three different launch options. Note: You can only run one of these commands at a time!
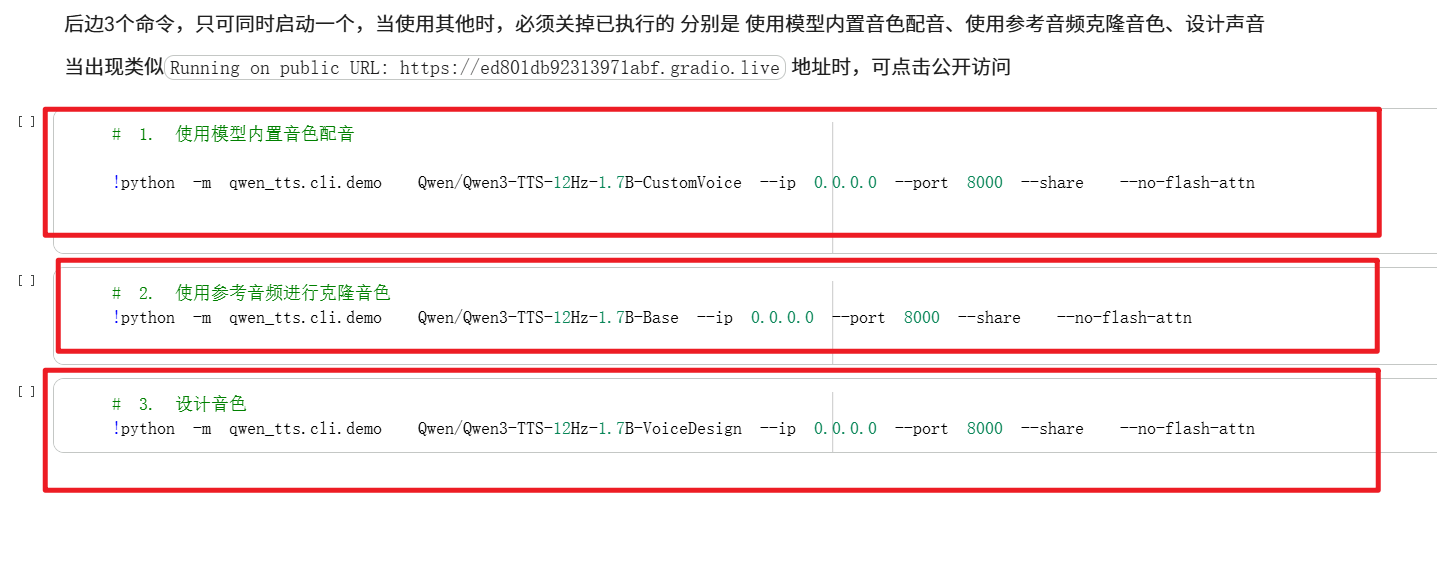
- 1. Use model's built-in voice: Best for converting text to speech using the system's default voice.
- 2. Clone voice with reference audio (🔥Recommended): This is the most common feature. Upload a few seconds of a recording, and the AI will mimic that voice.
- 3. Design voice: An advanced option to fine-tune voice characteristics.
How to do it: Click the "Play button ▶️" next to the feature you want to use.
Wait a few tens of seconds. In the log at the bottom, you'll see a URL ending in gradio.live (e.g., Running on public URL: https://xxxx.gradio.live).
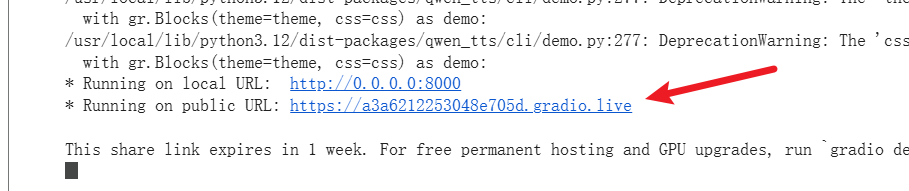
👉 Click this link to open the visual interface!
(Note: If you want to switch features, e.g., from cloning to design, you must first stop the currently running play button by clicking it again, then click the play button for the other feature.)
Step 5: Start Voice Cloning
After clicking the link, you'll enter the WebUI. The interface is very intuitive:
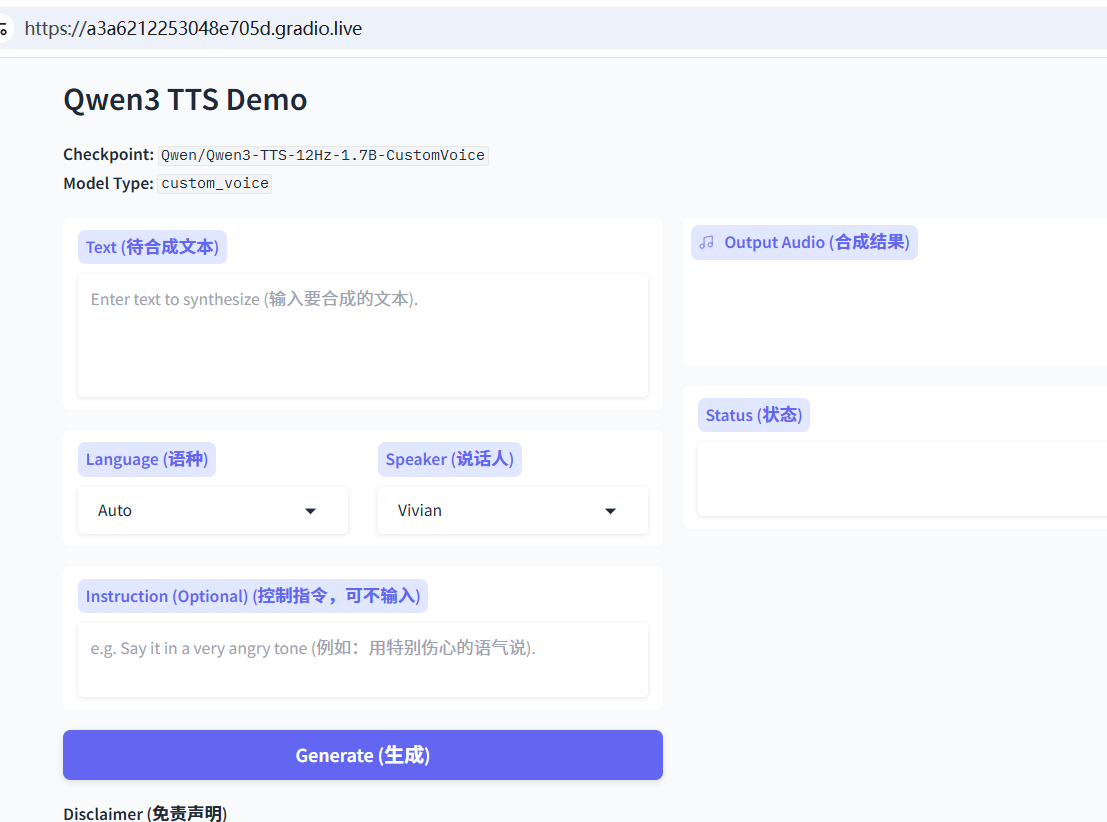
- Reference Audio: Drag and drop the audio file you want to imitate (e.g., mp3/wav) into the box on the left. Just a few seconds of clear human speech is enough.
- Target Text: Enter the text you want the AI to speak in the middle.
- Generate: Click the blue button and wait a moment.
The synthesized audio will appear on the right. You can play it directly or click to download and save.
Common Issues & Tips
- Disconnection: The free version of Google Colab has usage time limits and may disconnect if idle for too long. If disconnected, refresh the page and start again from "Step 1."
- Network: Ensuring a stable VPN connection is required throughout the entire process (including opening links, running code, and clicking the generated URL).
- Error Handling: If you encounter a strange error, try clicking "Runtime" in the menu bar, then "Disconnect and delete runtime," and then follow the steps again.