
Custom TTS API Channel
The Custom TTS API channel allows you to connect any third-party TTS service. As long as your API endpoint follows the required protocol format, you can use it in the video translation software.
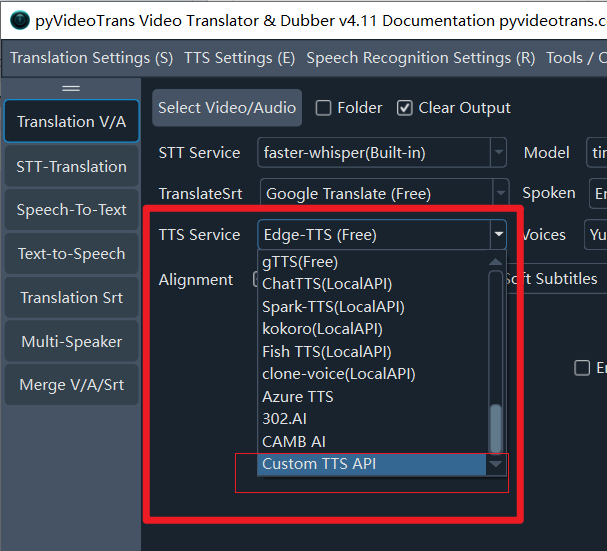
Use Cases:
- You have a self-hosted TTS service
- You use a third-party TTS relay/proxy service
- You need to connect to a custom or specific speech synthesis interface
Starting from v4.11, in addition to the standard application/x-www-form-urlencoded POST interface, we also support API interfaces based on Gradio WebUI.
Method 1 (Requires Coding): POST Request Interface Based on application/x-www-form-urlencoded
Click to expand Method 1 details
Request Method
- Method:
POST - Content-Type:
application/x-www-form-urlencoded
Request Parameters
| Parameter | Type | Description |
|---|---|---|
text | string | The text to be synthesized |
language | string | Language code of the text (e.g., zh-cn, en, ja, ko, etc.) |
voice | string | Voice character name |
rate | string | Speech rate adjustment, formatted as 0, +number%, or -number%, representing the percentage speed increase or decrease relative to normal speed |
ostype | string | Operating system: win32, mac, or linux |
extra | string | Extra parameters (can be configured in the software) |
If the selected voice is a reference audio or clone, the binary data of the reference audio will be sent to the API under the field name file.
Supported Language Codes
zh-cn, zh-tw, en, ja, ko, ru, de, fr, tr, th, vi, ar, hi, hu, es, pt, itResponse Format
Returns JSON format data:
{
    "code": 0,
    "msg": "ok",
    "data": "https://example.com/audio.mp3"
}Field Descriptions:
| Field | Description |
|---|---|
code | Status code: 0 for success, >0 for failure |
msg | Status message: ok on success, error reason on failure |
data | Returns the full URL of the MP3 file on success; empty on failure |
Formats Supported by the data Field
The data field returned by the API supports the following formats:
- URL: A full URL starting with
http; the software will automatically download the audio file. - Base64 Data: Base64-encoded audio data starting with
data:audio. - Hex-encoded Audio: A JSON object containing an
audiofield with hex-encoded audio data.
How to Use in the Software
Step 1: Configure the API Address
- Open the software and go to Menu → TTS Settings → Custom TTS API.
- Enter your endpoint URL in the API Address field.
- If there are extra parameters, enter them in the extra field.
Step 2: Test the Connection
- Click the Test button.
- If it returns success, the configuration is working properly.
- Save the settings.
Step 3: Start Dubbing
- Return to the main screen.
- Select
Custom TTS APIunder TTS Channel. - Select your target language and voice character.
- Start dubbing.
Implementation Example
Below is a simple implementation example using Python Flask:
from flask import Flask, request, jsonify

app = Flask(__name__)

@app.route('/tts', methods=['POST'])
def tts():
    text = request.form.get('text', '')
    language = request.form.get('language', '')
    voice = request.form.get('voice', '')
    rate = request.form.get('rate', '0')

    # Call your TTS service here
    # audio_url = your_tts_service(text, voice, rate)

    return jsonify({
        "code": 0,
        "msg": "ok",
        "data": audio_url  # Return the URL of the audio file
    })

if __name__ == '__main__':
app.run(host='0.0.0.0', port=8080)Notes & Best Practices
- The API URL must start with
http://orhttps://. - The returned JSON structure must strictly follow the specifications above.
- The audio file must be in MP3 format.
- If returning a URL, it must be a fully accessible direct link.
- For best performance, it is recommended to host the API service locally (e.g.,
127.0.0.1).
Troubleshooting
| Issue | Solution |
|---|---|
| API URL error | Check if the URL format is correct |
| Connection refused | Ensure the API service is currently running |
| Invalid response format | Check if the JSON structure matches the protocol |
| Failed to download audio | Check if the returned URL is accessible |
Method 2: Connect Any Voice Cloning TTS via Gradio WebUI
Many popular open-source TTS projects (such as Index-TTS, F5-TTS, CosyVoice, etc.) provide a Gradio WebUI. Starting from pyVideoTrans(v4.11), a universal Gradio API channel is supported.
⚠️ Important Prerequisites
- The WebUI must be built with Gradio (you will see
Use via APIor通过API使用at the bottom of the page). - The model in the WebUI must support voice cloning (reference audio cloning).
Step-by-Step Guide (Example: Index-TTS 2.5)
Prerequisite: Assuming you have already started the Index-TTS 2.5 WebUI in your browser (the process is identical for other TTS tools).
Step 1: Open the API Docs at the Bottom of the WebUI
- Open the TTS WebUI in your browser and scroll all the way to the very bottom.
- Find and click the small link
Use via API(or通过API使用) at the bottom right.
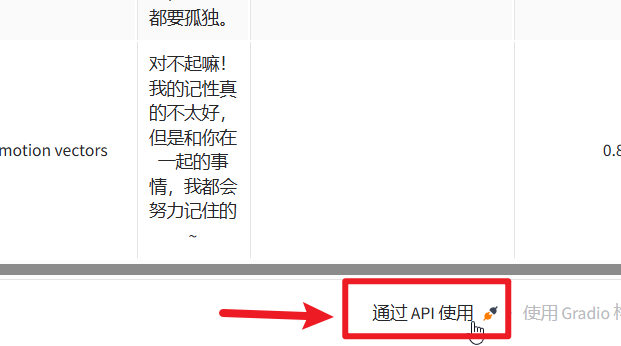
💡 Tip: If you cannot find the
APIlink at the bottom, it means the API is disabled in that WebUI. You can ask an AI tool to help enable the API by sharing the startup script (usuallyapp.pyorwebui.py).
Step 2: Find the "Voice Clone" Endpoint & Core Parameters
Clicking the link will open the API documentation page. You may see multiple endpoints listed. We need to find the specific endpoint responsible for voice cloning
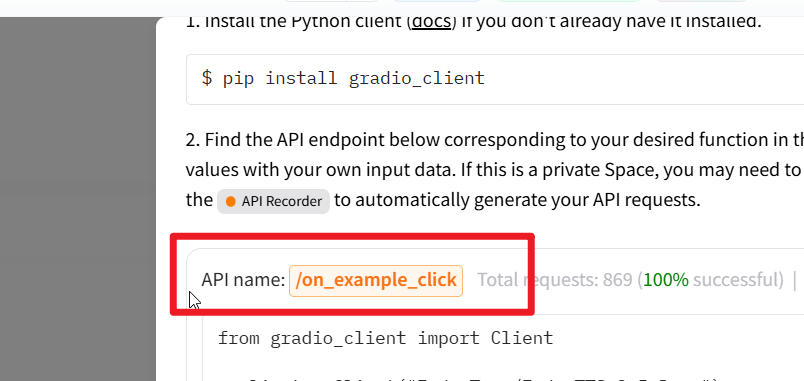
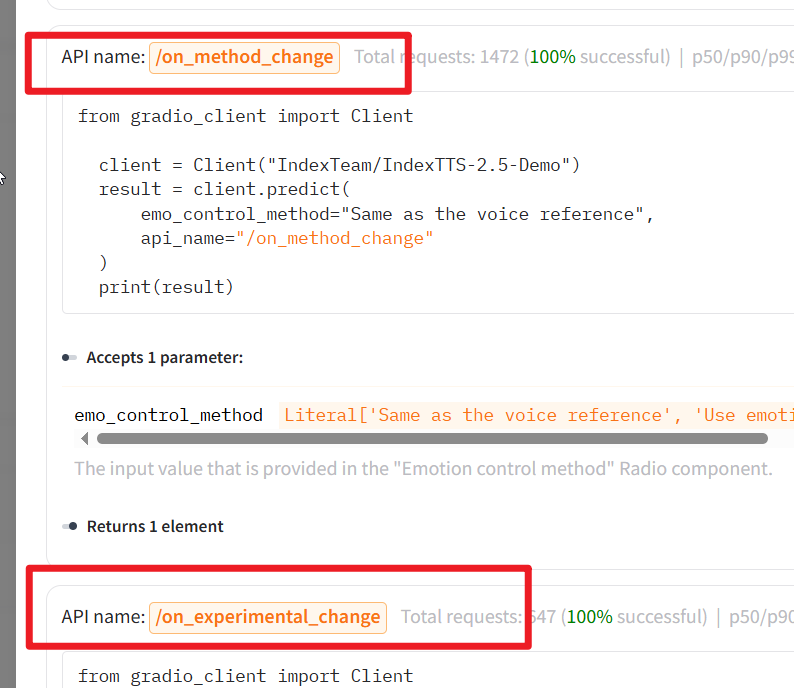
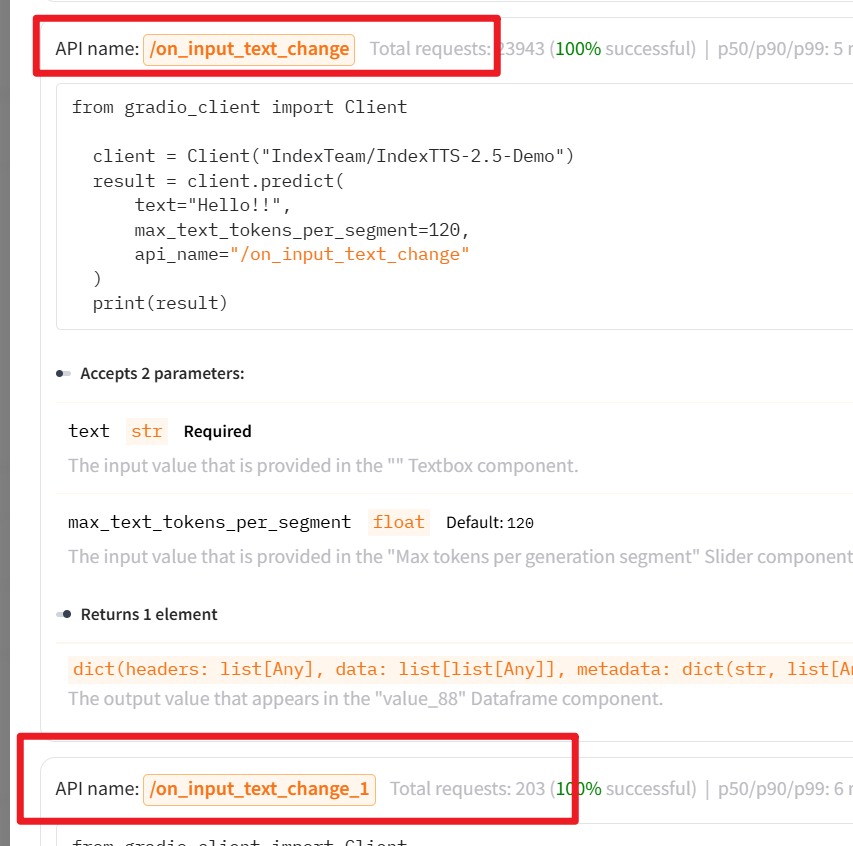
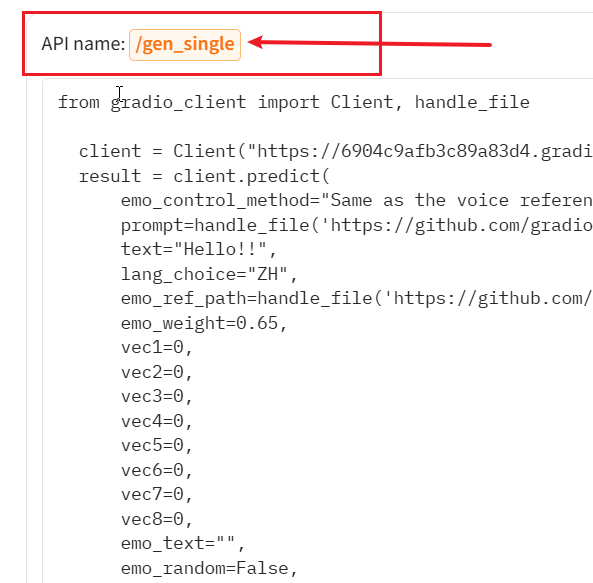
There might be many endpoints; in Index-TTS 2.5, only the one shown below is the voice clone endpoint:
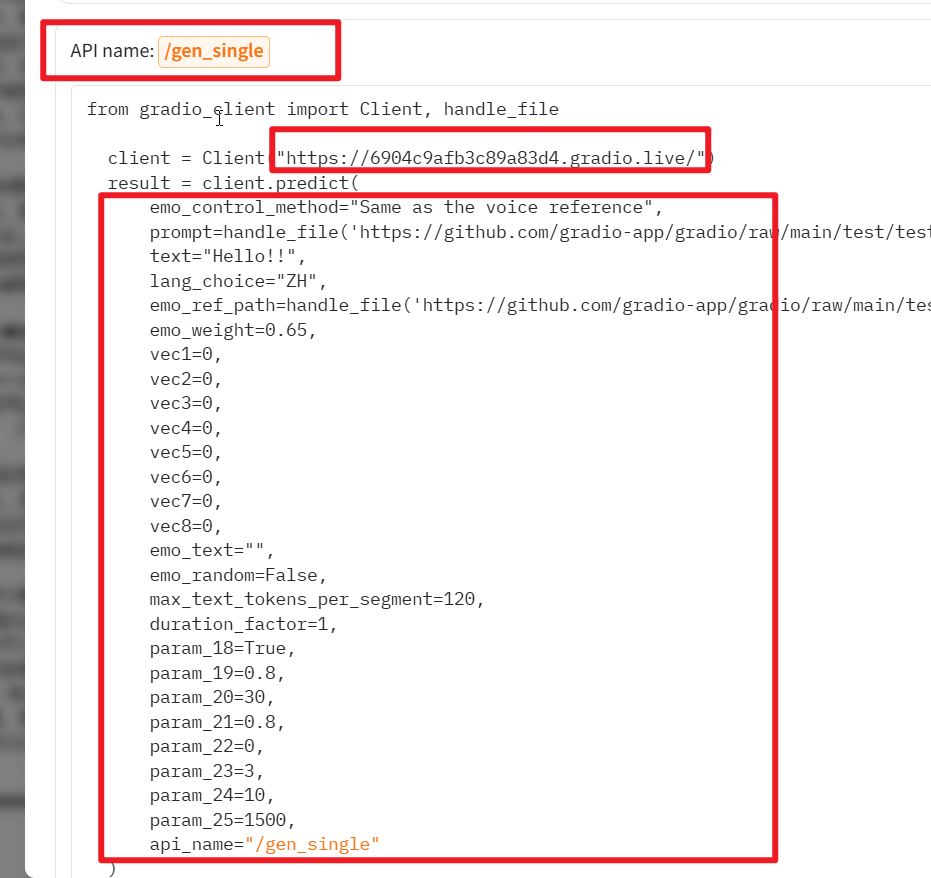
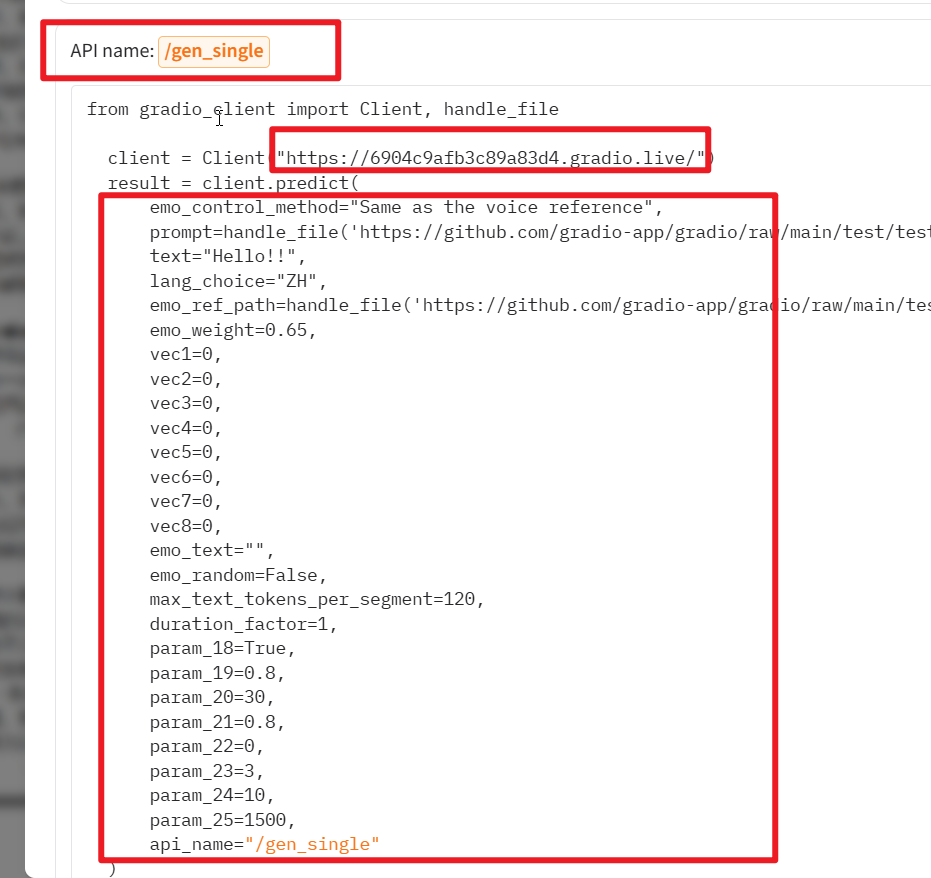
Left of = is the parameter name, right is the value
Under this endpoint, we need to identify the key parameters needed by the software. Typically, the first parameter and any parameters marked as Required must be configured:
Scroll down to view the parameter description list:
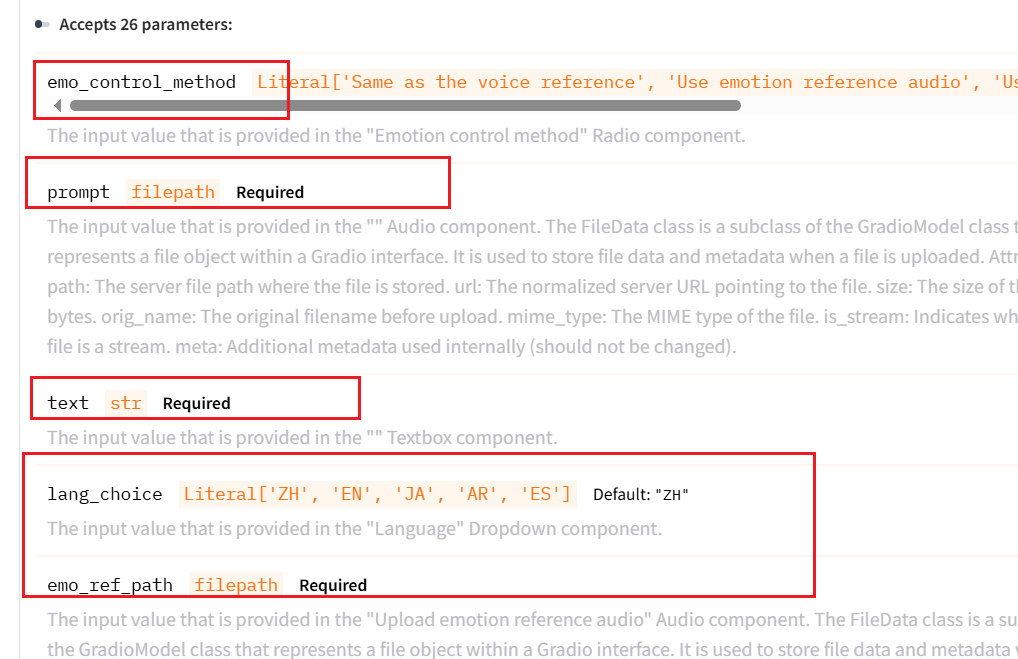
📝 Parameter Types & Rules Explained Simply:
api_name(Endpoint name, Required): Tells the software which API endpoint to call. Scroll to the bottom of the endpoint section to find it. For example, in Index-TTS 2.5, it is/gen_single(the value shown next toAPI name).
- Target Text Parameter (Required): Usually named
text,tts_text, etc. In Index-TTS 2.5, it istext. - Reference Audio Parameter (Required): Usually named
prompt,ref_audio,prompt_audio,prompt_wav, etc. In Index-TTS 2.5, it isprompt. - Reference Audio Text (Optional / Depends on model): Usually named
prompt_textorref_text. Index-TTS 2.5 does not require it, but many models do. - Language/Dropdown Parameters (Note the
Literaltag): If a parameter hasLiteral[...], it is a single-choice parameter. Its value must exactly match one of the options in the brackets (case-sensitive).

- For example,
lang_choice: Literal['ZH', 'EN', 'JA', 'AR', 'ES']means you can only enter one ofZH,EN,JA,AR, orES. - For example,
emo_control_method: Literal['Same as the voice reference', ...], we choose the first optionSame as the voice reference(meaning the emotional tone follows the reference audio).
Step 3: Create and Edit the gradio_api.txt Configuration File
Now, we need to pass these parameters to pyVideoTrans.
- Go to the root directory of pyvideotrans (the folder containing
sp.exeorsp.py). - Create a new text file in this folder and name it
gradio_api.txt.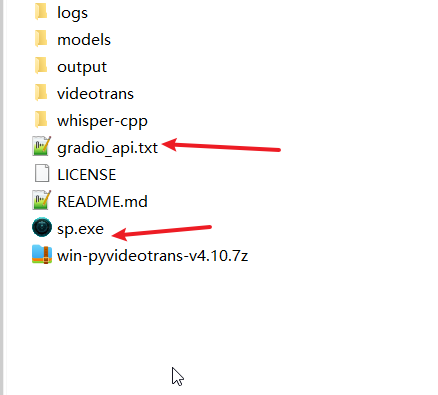
- Open the file and enter key-value pairs in the format
parameter_name=parameter_value(one per line), as shown below: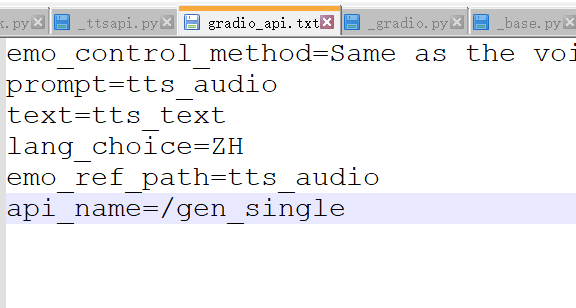
⚠️ Key Concept: Dynamic Placeholders (Fixed Syntax)
During dubbing, the text to be spoken and the reference audio change dynamically for each line or character. Therefore, you must use software-specific "placeholders" for these values:
| Purpose | Fixed Value to Fill (Placeholder) | Description |
|---|---|---|
| Target text for dubbing | tts_text | The software will automatically replace this with each subtitle line |
| Reference audio file | tts_audio | The software will automatically replace this with the clone audio path of the selected character |
| Reference audio transcript | tts_audio_text | Required by some models; automatically replaced with the transcript of the reference audio. Leave this line out if not required by the model |
Taking Index-TTS 2.5 as an example, add the following to gradio_api.txt:
emo_control_method=Same as the voice reference
prompt=tts_audio
text=tts_text
lang_choice=ZH
emo_ref_path=tts_audio
api_name=/gen_singleOnce filled out, save and close the file.
Step 4: Enter the WebUI Address in the Software
- Open the
pyvideotranssoftware. - Click the top menu: Settings -> TTS Settings -> Custom TTS API.
- Enter your WebUI URL (e.g.,
http://127.0.0.1:7860/) in the address field and click Save.
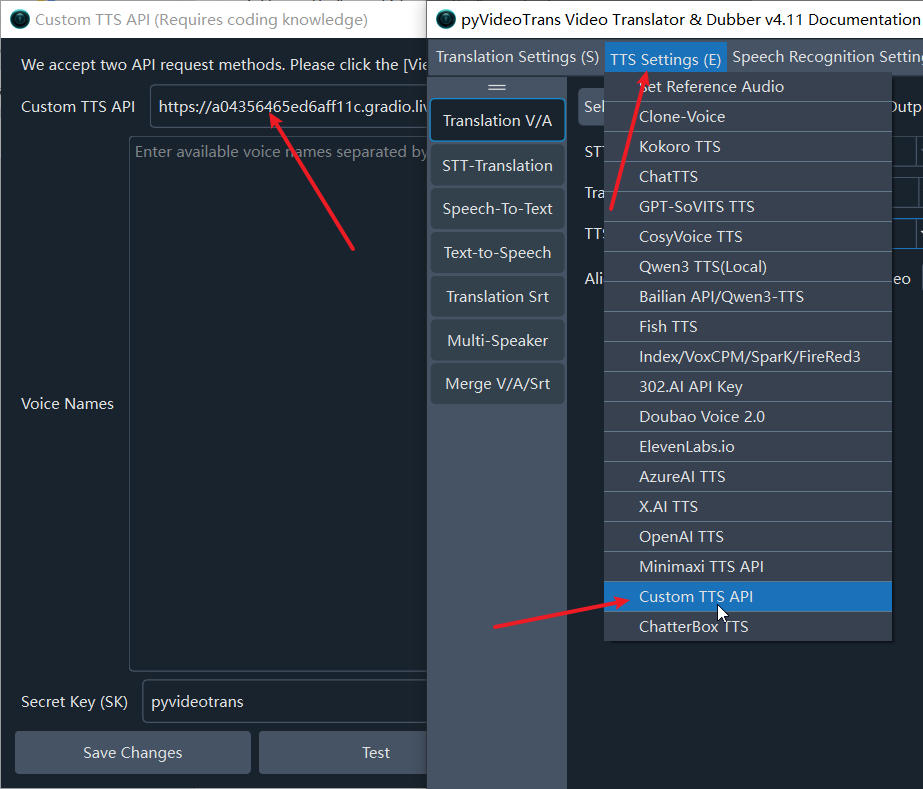
Step 5: Select Voice Character and Start Dubbing
After configuring, select the custom channel on the main interface:
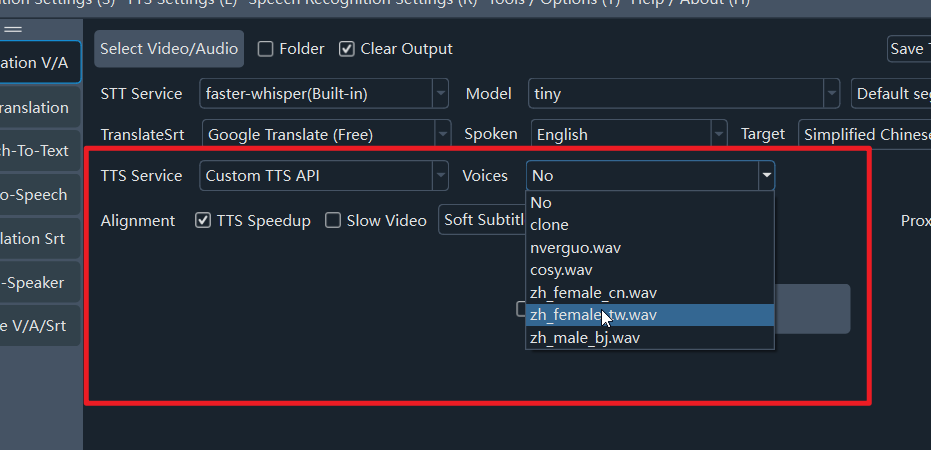
- In the Voice / Character dropdown on the main screen, select your reference audio (or select the
clonevoice). When generating, the software will automatically call your Gradio TTS interface to clone the voice.
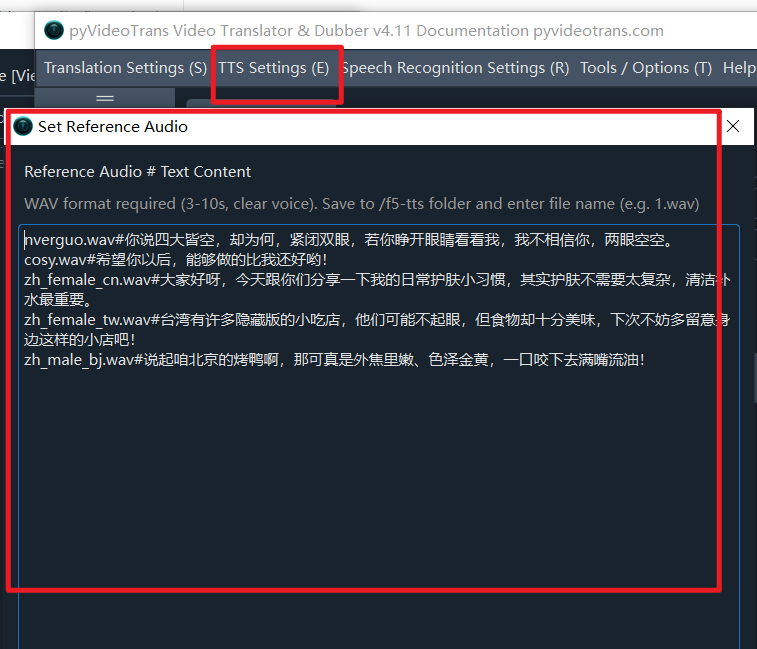
- To add more voice cloning samples, click the top menu: Settings -> TTS Settings -> Set Reference Audio to manage them.
Examples
These examples are based on each project's official
webui.py. If their WebUI changes, these settings may become invalid.If you encounter issues, feel free to leave a comment with the official repo link or screenshots of the API endpoint parameters.
Index-TTS 2.5: gradio_api.txt Configuration
emo_control_method=Same as the voice reference
prompt=tts_audio
text=tts_text
lang_choice=ZH
emo_ref_path=tts_audio
api_name=/gen_singleF5-TTS: gradio_api.txt Configuration
gen_text_input=tts_text
ref_audio_input=tts_audio
ref_text_input=tts_audio_text
remove_silence=false
randomize_seed=false
seed_input=0
api_name=/basic_ttsOmniVoice: gradio_api.txt Configuration
text=tts_text
lang=Auto
ref_aud=tts_audio
ref_text=tts_audio_text
instruct=
du=0
api_name=/_clone_fnQwen3-TTS: gradio_api.txt Configuration
ref_audio=tts_audio
ref_text=tts_audio_text
target_text=tts_text
language=Auto
use_xvector_only=false
model_size=1.7B
api_name=/generate_voice_clone