pyVideoTrans WebUI User Guide
⚠️ Important Notice
The WebUI version only implements a subset of features, and is primarily intended for the following scenarios:
- Cloud server deployment (remote access to translation services)
- LAN deployment (separated server and client machines)
- Docker containerized deployment
For complete features, please use the desktop client (
sp.exe) or run from source (sp.py). The desktop version supports advanced features such as extended API channel configurations, real-time interactive editing, and batch processing.
1. Deployment Methods
1.1 Source Code Deployment (Recommended)
git clone https://github.com/jianchang512/pyvideotrans.git
cd pyvideotrans
uv sync --extra webuiStart the service:
uv run webui.py                    # Default: 0.0.0.0:7860
uv run webui.py --port 8080        # Specify port
uv run webui.py --host 127.0.0.1   # Localhost access only
uv run webui.py --share # Create a Gradio public linkAccess via: http://127.0.0.1:7860 or http://<Server_IP>:7860
1.2 Docker Deployment
# Build the image
git clone https://github.com/jianchang512/pyvideotrans.git
cd pyvideotrans
docker build -t pyvideotrans-webui .

# Run
docker run -d -p 7860:7860 --name pyvideotrans pyvideotrans-webui

# Persist configuration and output
docker run -d -p 7860:7860 \
  -v ./data/output:/app/output \
  -v ./data/config:/app/videotrans \
  --name pyvideotrans pyvideotrans-webui

# GPU Acceleration
docker run -d -p 7860:7860 --gpus all \
  -v ./data/output:/app/output \
  -v ./data/config:/app/videotrans \
--name pyvideotrans pyvideotrans-webui1.3 Google Colab
- Open https://colab.research.google.com/drive/1kPTeAMz3LnWRnGmabcz4AWW42hiehmfm?usp=sharing
- Sign in to your Google account → Click Run all
- Wait for the
*.gradio.livelink to appear, then click it to use the WebUI.
⚠️ The free version of Colab has a usage limit of 4 to 6 hours.
1.4 Huggingface.co
- Open https://huggingface.co/spaces/mortimerme/pyvideotrans
- Click the three dots icon in the top right corner and select
Clone repository. - Clone the repository to your own account and run it.
Running on a 2-core CPU is free; GPU resources need to be purchased on huggingface.co.
2. Interface Overview
The WebUI is divided into three tabs:
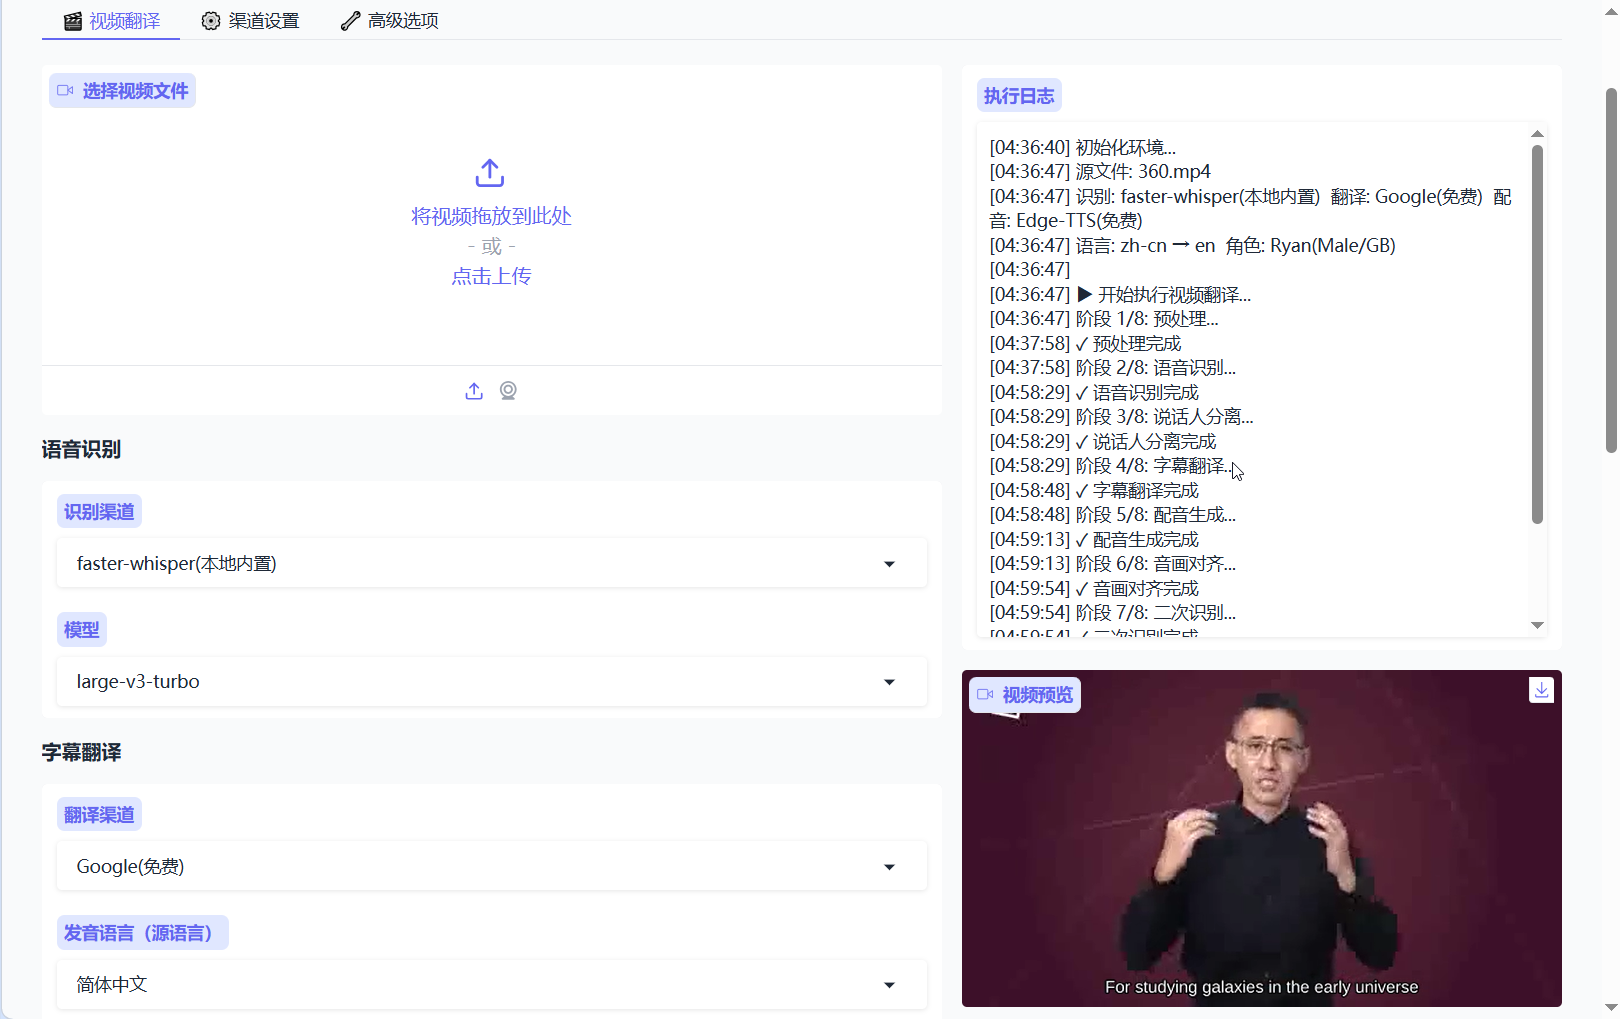
2.1 🎬 Video Translation (Main Interface)
File Selection: Supports formats like mp4, mkv, avi, mov, webm, wav, mp3, m4a, flac, etc.
Speech Recognition (ASR): Options include faster-whisper, openai-whisper, Qwen-ASR, FunASR, and Huggingface_ASR (all are built-in, local, and free channels).
Subtitle Translation: Options include Google, Microsoft, and M2M100 (free channels).
Subtitle Dubbing (TTS): Options include Edge-TTS, Qwen3-TTS, MOSS-TTS, Piper, VITS, Supertonic, ChatterBox, and gTTS (free/built-in local channels).
Alignment & Subtitles: Dubbing acceleration, video deceleration, speech rate/volume/pitch adjustments, and subtitle embedding types.
More Settings: Noise reduction, punctuation processing, vocal separation, background audio embedding, and CUDA acceleration.
Hard Subtitle Style Editing: Comprehensive customization of font, color, stroke, shadow, alignment, etc.
2.2 ⚙️ Channel Settings
Configure the API URLs, Secret Keys (SK), and models for various channels. These settings are shared with the desktop version and saved in videotrans/params.json.
Includes: Translation channels, speech recognition channels, dubbing channels, and reference audio settings.
Before using API channels, you must first configure the API URLs and SKs using the desktop version (
sp.exe).
2.3 🔧 Advanced Options
Configure global advanced parameters. These are fully identical to Menu → Tools → Advanced Options in the desktop version.
Includes: General settings, video output control, speech recognition parameters, subtitle translation adjustments, subtitle dubbing adjustments, audio-video sync alignment, and Whisper model prompts.
3. Executing Translation
- Select a video/audio file.
- Configure recognition/translation/dubbing parameters.
- Click "🚀 Start Execution".
Execution Process:
- The button changes to "⏳ Processing..." and becomes disabled.
- The log on the right displays the progress of the 8 stages in real time.
- Upon completion, the button is restored. The video can be played online in the preview area, and files can be downloaded from the file area.
4. Comparison with Desktop Version
| Feature | WebUI | Desktop Version |
|---|---|---|
| Full video translation workflow | ✅ | ✅ |
| API Channels (requires desktop setup) | ✅ | ✅ |
| Advanced Options Configuration | ✅ | ✅ |
| Real-time interactive subtitle editing | ❌ | ✅ |
| Batch processing | ❌ | ✅ |
| Video preview playback | ✅ | ❌ |
| Remote Access / Docker | ✅ | ❌ |
5. Frequently Asked Questions (FAQ)
Q: Startup error: No module named gradio Run: uv sync --extra webui
Q: How to persist configuration in Docker? Use: -v ./data/output:/app/output -v ./data/config:/app/videotrans
Q: How to use GPU in Docker? After installing the nvidia-container-toolkit, run: docker run --gpus all ...
Q: How to use API channels? First, configure the API URLs and SKs using the desktop version. The WebUI will automatically read the configuration from params.json.
Q: How to create a public link? Run uv run webui.py --share. The console will output a temporary *.gradio.live link.