NVIDIA RTX 5090 GPU Acceleration Not Working After Installation? Don't Worry, Here Are the Fixes!
Many enthusiasts who love locally deploying AI projects are always chasing NVIDIA's latest graphics cards. When the RTX 4090 launched, they couldn't wait to upgrade and experience lightning-fast computing power. The release of the RTX 5090 sparked another wave of buying frenzy. However, after installing the 5090, tragedy struck: programs couldn't utilize GPU acceleration, running as slow as a turtle, or even crashing with errors right at startup!
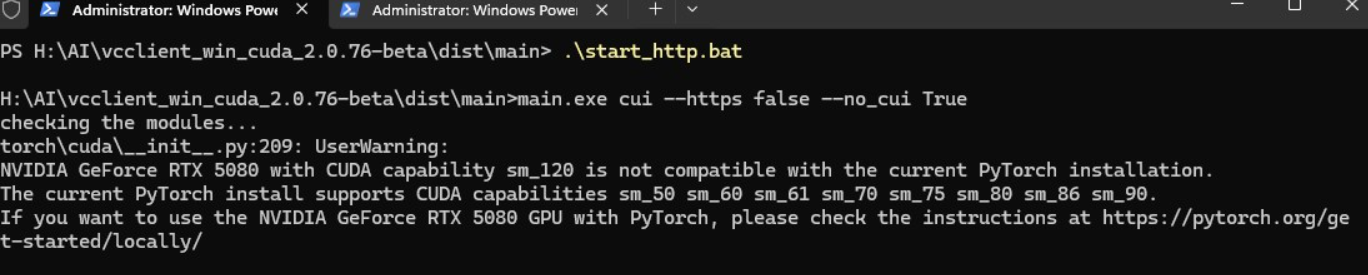
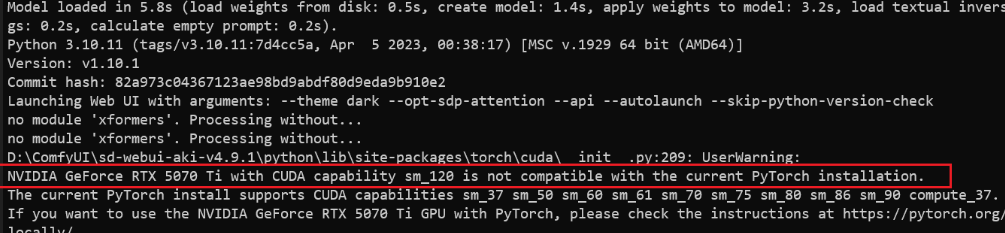
 NVIDIA GeForce RTX 5070 Ti with CUDA capability sm_120 is not compatible with the current PyTorch installation.
 The current PyTorch install supports CUDA capabilities sm_50 sm_60 sm_61 sm_70 sm_75 sm_80 sm_86 sm_90.
 ...
RuntimeError: CUDA error: no kernel image is available for execution on the deviceSome suspected the CUDA or PyTorch version was too old, so they upgraded to CUDA 12.8 and PyTorch 2.6, but the problem persisted.
Actually, the reason is simple: The underlying architectures of the RTX 4090 and RTX 5090 are different, and the torch library is incompatible.
The 4090 uses the Ada Lovelace architecture, while the 5090 uses the brand-new Blackwell architecture. The current official PyTorch version does not yet fully support the 5090's Blackwell cores, so updating doesn't help.
So, is the 5090 unusable? Of course not! Below are two solutions, designed for both Windows and Linux users, simple and easy to follow. Let's go step by step!
First, upgrade to CUDA 12.8
Method 1: Install the PyTorch Nightly Build
- This is PyTorch's "daily updated version," which has begun supporting the 5090's Blackwell architecture and can be used as a workaround.
- The downside is that it's less stable and might have occasional minor issues, but it should generally run.
Installation Steps for Windows Users
Choose the installation method based on your project deployment type
- Source Code Deployment: If you built the environment yourself, first activate the virtual environment: For example, type
venv\Scripts\activate. Seeing the(venv)prefix indicates success (this is just an example; use your actual virtual environment). - All-in-One Package: Search for
python.exe, navigate to its folder, typecmdin the address bar and press Enter. In the opened terminal, typepython -m, but don't press Enter yet. Wait for the next step to paste the command. - Command to Install PyTorch Nightly
pip install --pre torch torchvision torchaudio --index-url https://download.pytorch.org/whl/nightly/cu128- Paste the command into the command line, press Enter, and wait patiently for the installation to complete.
Installation Steps for Linux Users
- Activate the Virtual Environment For example, type
source venv/bin/activate. Seeing the(venv)prefix indicates success (again, just an example; use your actual environment name). - Command to Install PyTorch Nightly
pip3 install --pre torch torchvision torchaudio --index-url https://download.pytorch.org/whl/nightly/cu128- Paste the command into the terminal and press Enter.
Note: The Nightly build may be unstable. If you encounter errors while running your project, you can try Method 2.
Method 2: Install a Third-Party PyTorch Package
- This is a community-provided PyTorch version (based on 2.6.0) that has been adapted for the 5090 and is reportedly more stable in practice.
- The downside is the lack of the
torchaudiolibrary. If your project needs torchaudio for audio processing, it might cause errors.
First, Download the .whl Files
- Open the webpage:
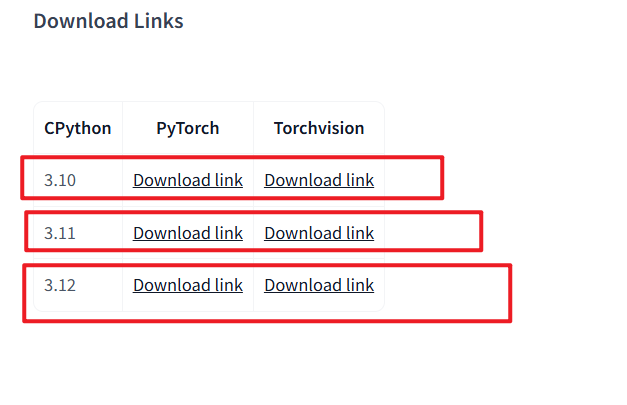
https://huggingface.co/w-e-w/torch-2.6.0-cu128.nv - Scroll to the bottom of the page and find your Python version (e.g., 3.10 for Python 3.10, 3.11 for 3.11).
- Each version has 2
.whlfiles (torchandtorchvision). Click the links to download them. - Place both files in a folder without any spaces in its path, otherwise installation might fail (e.g.,
D:\downloador/home/user/temp).
Installation for Windows Users
Choose the installation method based on your project deployment type
- Source Code Deployment:
- Open Command Prompt (Win + R, type
cmd, press Enter). - Activate the virtual environment: For example, type
venv\Scripts\activate. You should see the(venv)prefix. - Enter the installation command:
- Open Command Prompt (Win + R, type
pip install --force-reinstall "path\to\first.whl" "path\to\second.whl"Alternatively, you can drag and drop the files: Type pip install --force-reinstall , then drag both .whl files into the window. Make sure to add a space between the two .whl file paths, then press Enter.
- All-in-One Package:
- Search for
python.exe. If found, navigate to that folder, typecmdin the address bar, and press Enter to open a cmd console. - Enter the installation command:
- Search for
python -m pip install --force-reinstall "path\to\first.whl" "path\to\second.whl"Or, after typing python -m pip install --force-reinstall , directly drag these 2 files into the cmd terminal, then press Enter.
Installation for Linux Users
- Activate the Virtual Environment Open a terminal and type
source venv/bin/activate. - Install the .whl Files Enter the command:
pip3 install --force-reinstall /path/to/first.whl /path/to/second.whlOr directly drag both .whl files into the terminal, add a space between the two .whl file paths, and press Enter.
Which Method is Better?
- Try Method 1 First: The Nightly build is feature-complete, updates quickly, and suits most situations.
- Use Method 2 as Backup: The third-party package is more stable but lacks
torchaudio, suitable for projects not dependent on audio. - Ultimate Solution: Wait for the official stable PyTorch version that supports the 5090 (might take a few months). Then, using the official version will be the most hassle-free.
Frequently Asked Questions
- Installation prompts "whl file does not exist" or "No such file"
- Your .whl files might be saved in a folder with spaces in its name or path, causing the command to misinterpret them as separate arguments.
- Solution: Copy the .whl files to a folder without any spaces in its path, ensuring the entire path from the drive letter has no spaces. Alternatively, wrap the .whl file path in English double quotes
", e.g.,"/pa th/to/first.whl".
Still getting errors after installation?
- Check CUDA: Run
nvidia-smito confirm the 5090 is recognized and the CUDA version is 12.8. - Ensure your Python version matches the
.whlfiles (e.g., Python 3.10 uses the 3.10 .whl files).
- Check CUDA: Run
Still running very slow?
- Check GPU utilization: Use Task Manager on Windows, or
nvidia-smion Linux.
- Check GPU utilization: Use Task Manager on Windows, or
Now, you should be able to unleash the computing power of your RTX 5090!