In addition to the core video and audio translation, pyVideoTrans also provides several powerful independent features.
Transcribe and Translate Subtitles
Supported video formats:
mp4/mov/avi/mkv/webm/mpeg/ogg/mts/tsSupported audio formats:
wav/mp3/m4a/flac/aac
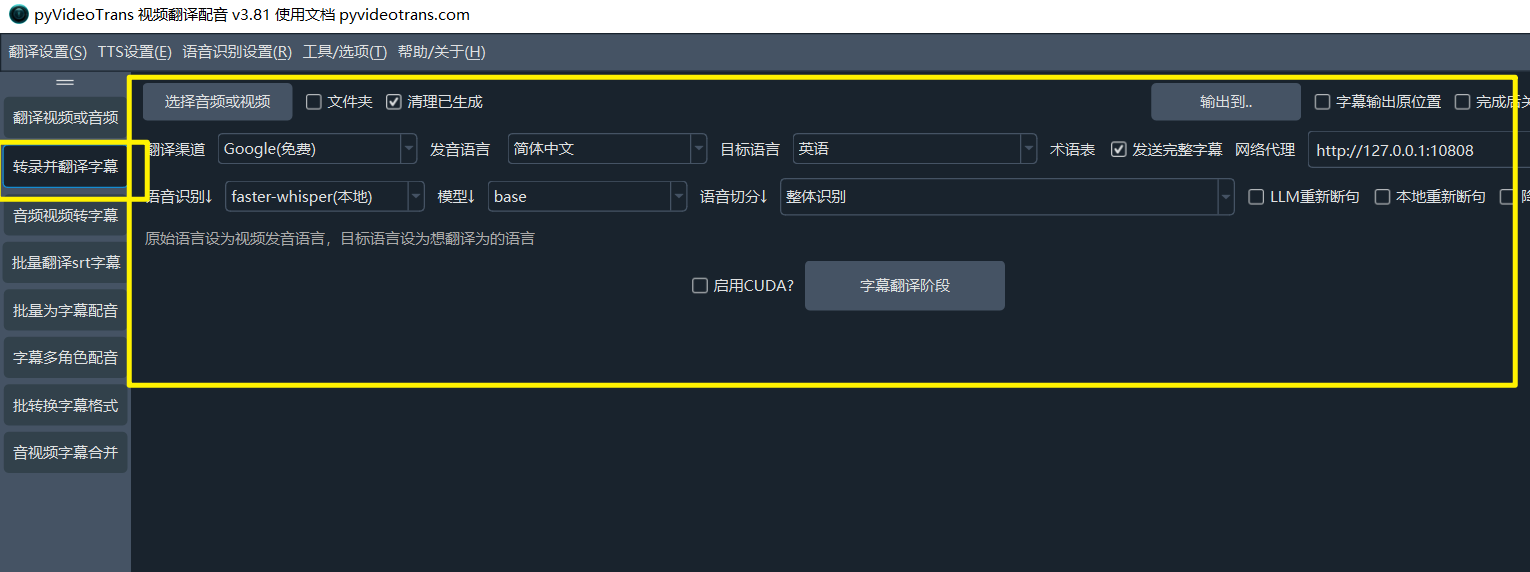
This feature is essentially the first half of the video translation process. It transcribes audio/video to generate an SRT subtitle file, then translates that subtitle file into the specified language, and stops there. If you only want to generate subtitles from audio/video, you can choose this feature.
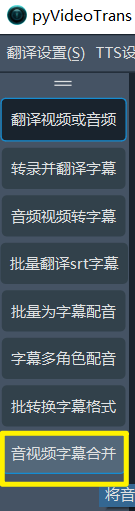
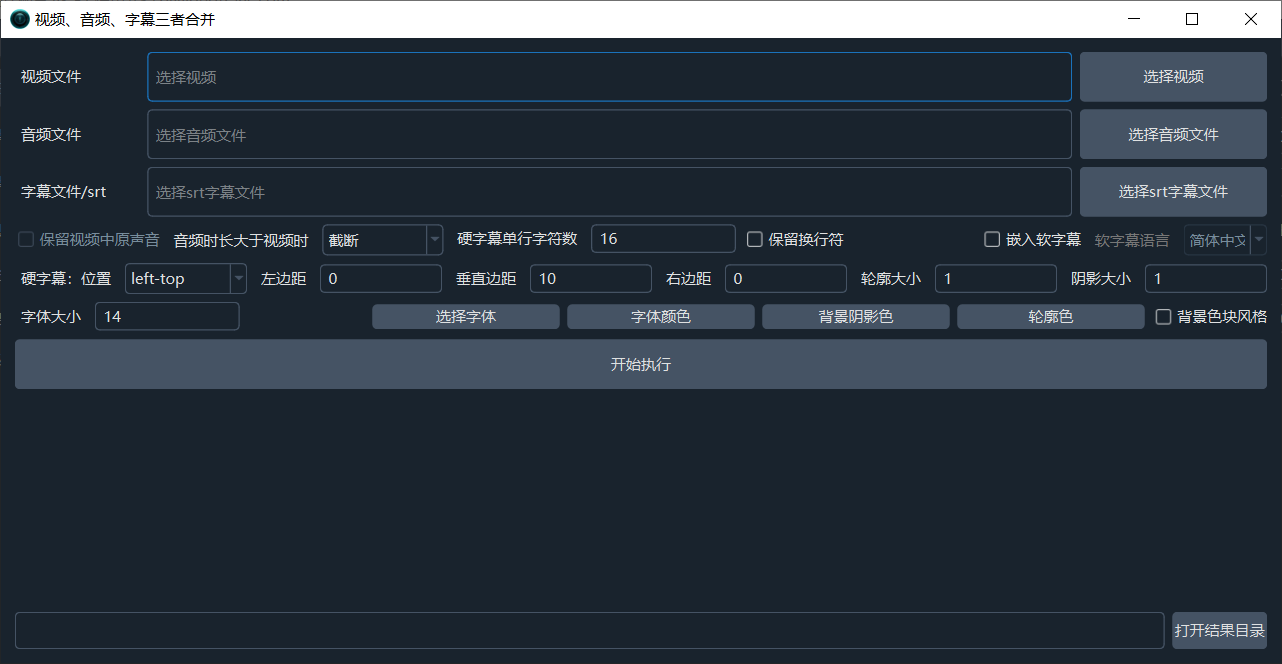
Audio/Video/Subtitle Merging
This is a practical post-processing tool. When you have separate video, dubbed audio, and subtitle files, you can use it to perfectly merge the three into a final video file, with support for custom subtitle styles.
Clip Video by Subtitles
If you have a video with a corresponding subtitle file (srt/ass/vtt) and want to clip out specific highlight segments corresponding to certain subtitle lines, this feature is suitable.
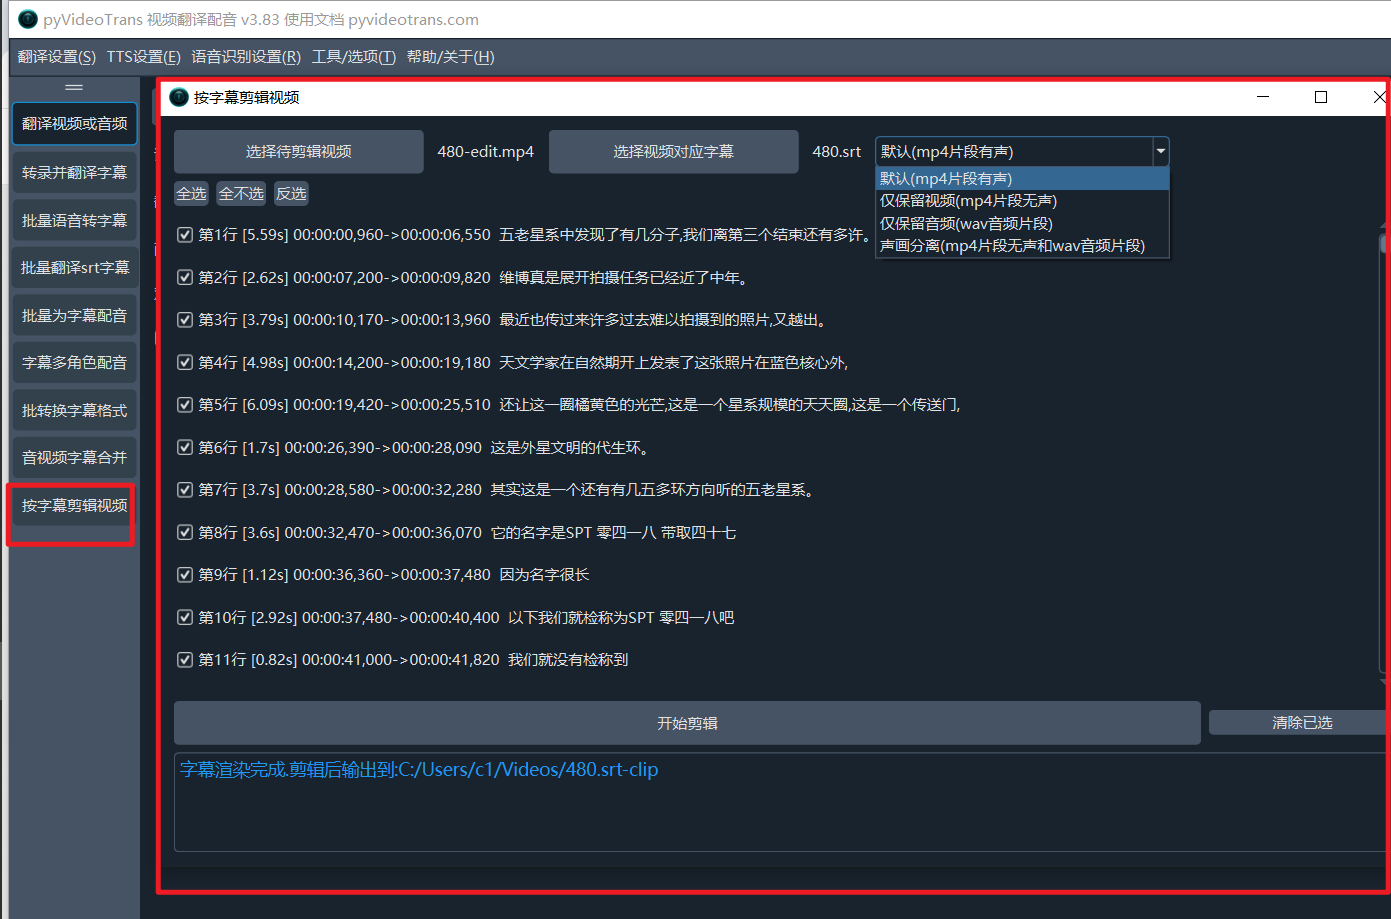
Select the video to clip and its corresponding subtitle file, then choose the specific subtitle segments you want to extract. Options include clipping with audio (default), clipping silent video only, clipping audio only, or independently clipping silent video and audio.
Real-time Speech-to-Text
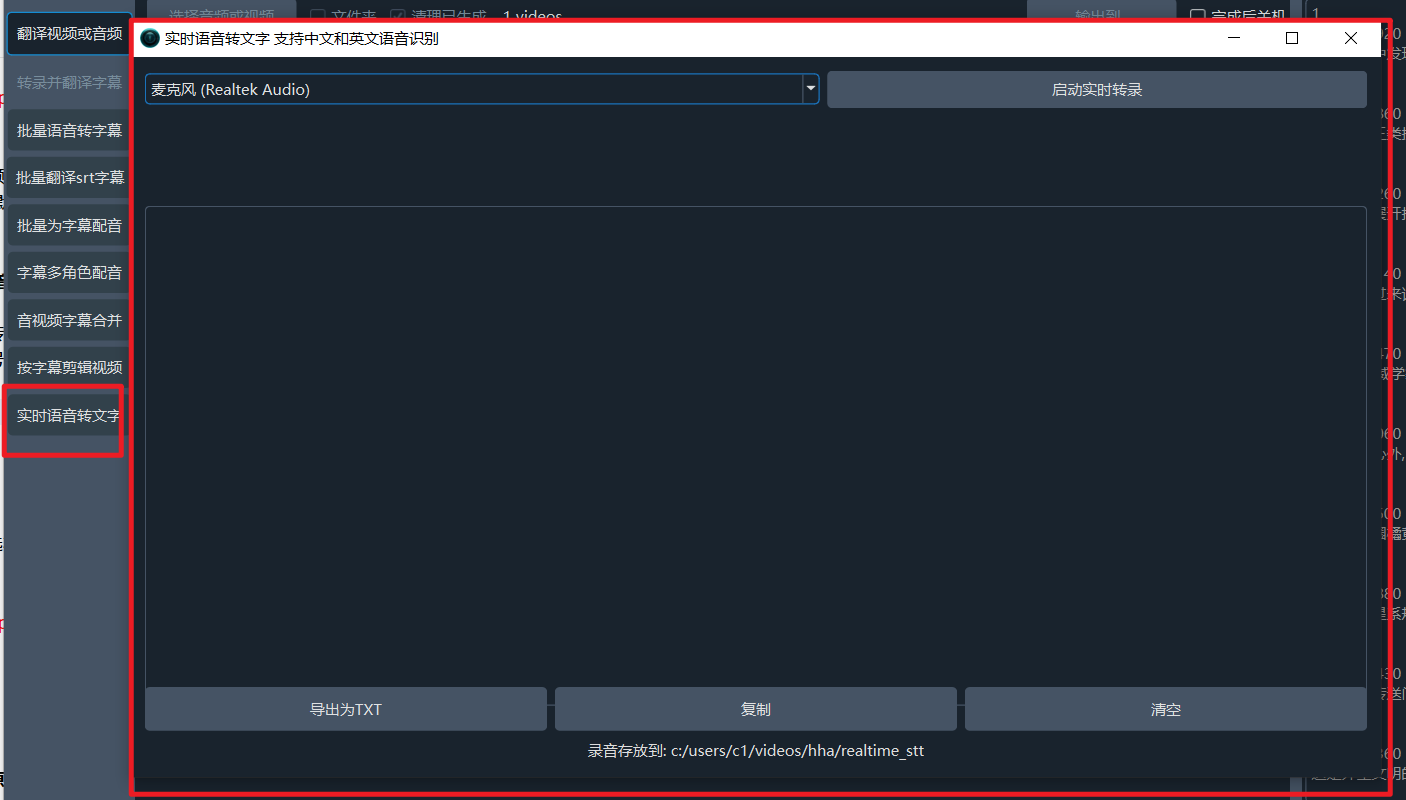
Can listen to speech from the microphone and convert it to text in real-time, with a delay of less than 2 seconds. It can automatically segment recognized text into sentences, add punctuation, export to txt, save recording files, etc.
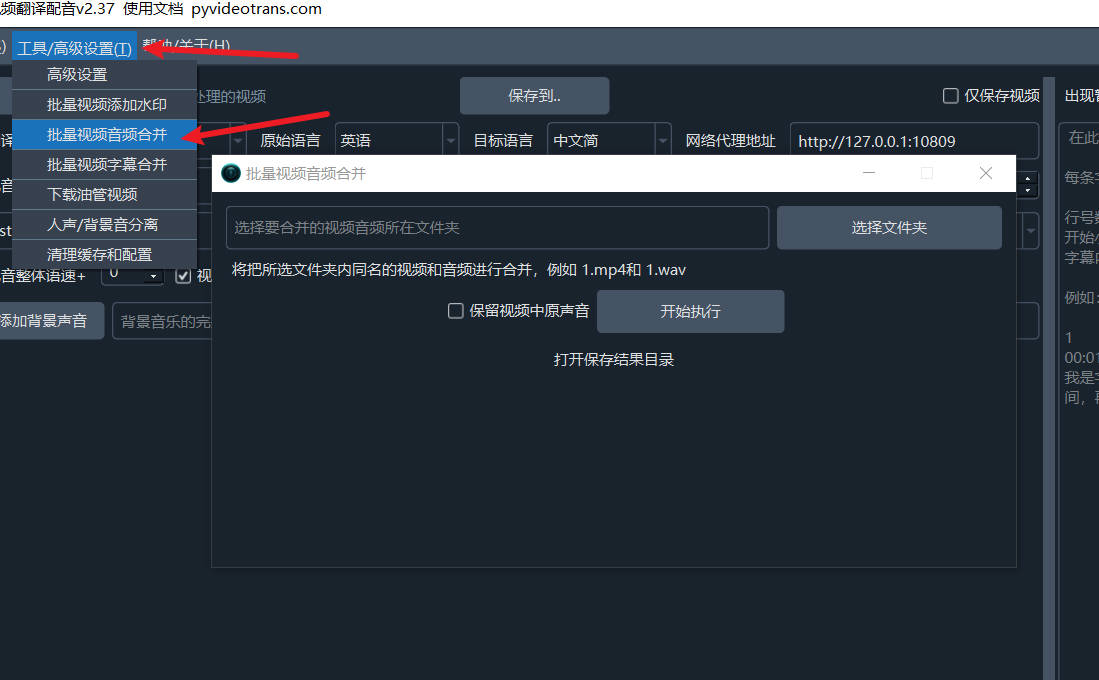
Batch Merge Videos and Audio
If you have many videos and corresponding audio files and want to embed each audio into its corresponding video, doing them one by one is tedious and inefficient. Using this feature, you can batch embed audio into videos.
How to Use
Create a folder and move the videos and audio files you want to merge into this folder.
The video and audio files to be merged must have the same name (excluding the extension). The program uses this to determine which audio belongs to which video.
Assuming the full video name is 001.mp4, the name without the extension is 001. The audio file you want to embed into this video must be named 001. If the audio is in wav format, the full name will be 001.wav; if it's mp3, the full name will be 001.mp3.
During processing, the software gets 001.mp4, removes the extension to get 001, and then searches the folder for 001.wav, 001.mp3, 001.flac, 001.aac, or 001.m4a. If found, it embeds that audio into the video 001.mp4.
Select this folder in the software interface.
Set whether to keep the original audio from the video. If selected, the processed video will contain two audio tracks: the original sound from the video file and the sound from the audio file.
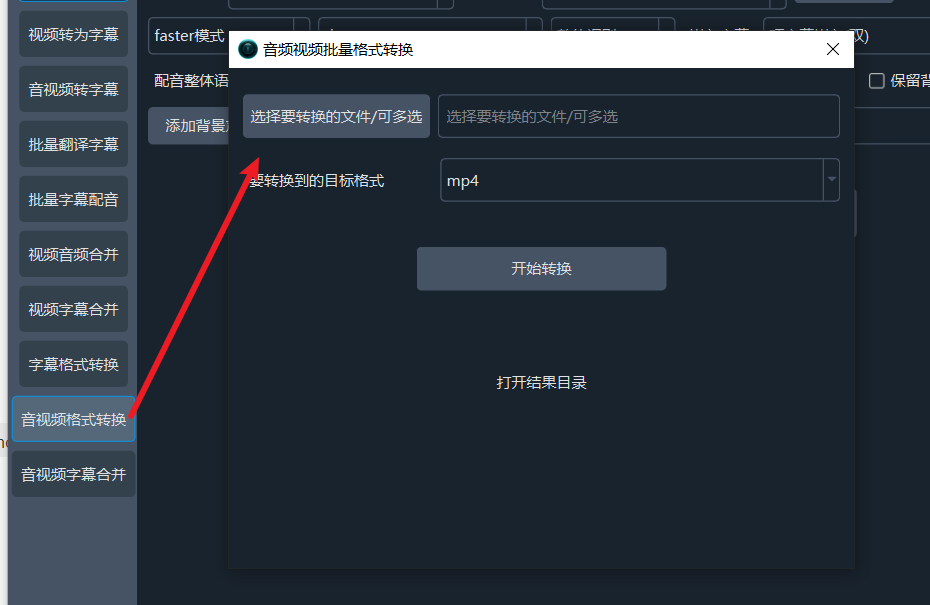
Audio/Video Format Conversion
Used to batch convert audio or video files to other formats, e.g., converting wav audio to mp3.
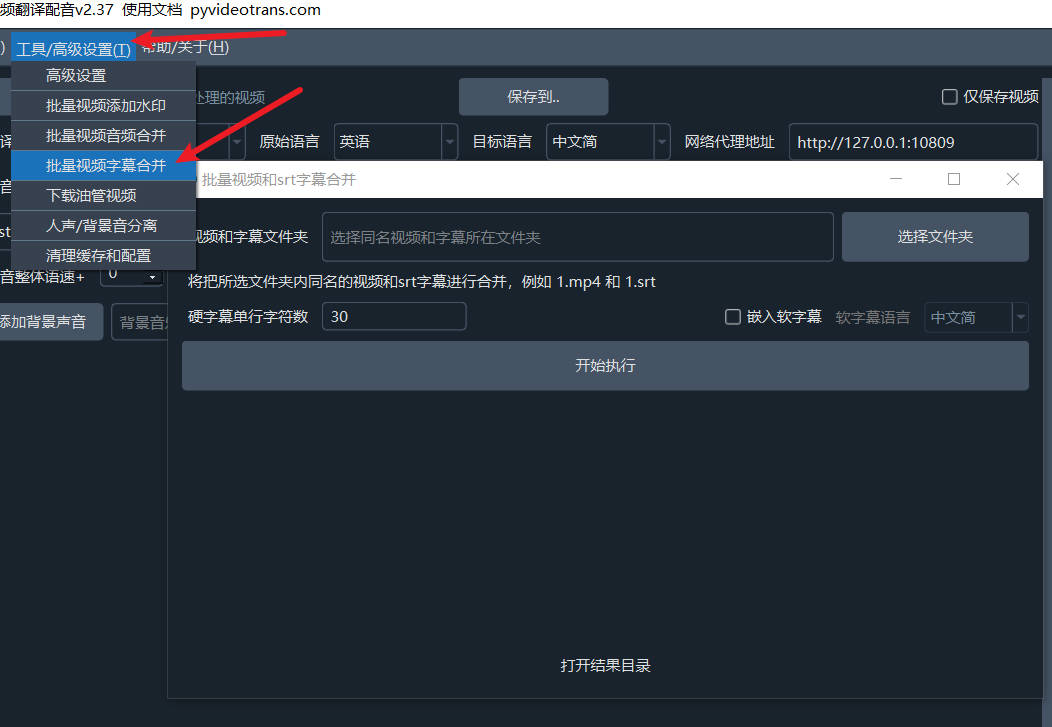
Batch Merge Videos and SRT Subtitles
Similar to batch video and audio merging, you can also batch embed subtitle files into their corresponding videos. For example, if you have 20 videos, each with a corresponding SRT subtitle file, using this feature allows you to embed all 20 SRT files into their respective 20 videos at once.
How to Use
Create a folder and move the videos and SRT subtitle files you want to merge into this folder.
The video and subtitle files to be merged must have the same name (excluding the extension). The program uses this to determine which SRT subtitle belongs to which video.
Assuming the full video name is 001.mp4, the name without the extension is 001. The SRT subtitle file you want to embed into this video must be named 001.srt.
During processing, the software gets 001.mp4, removes the extension to get 001, and then searches the folder for 001.srt. If found, it embeds that subtitle file into the video 001.mp4.
Select this folder in the software interface.
Subtitles are embedded as hard subtitles by default. If you select "Embed soft subtitles," they will be embedded as soft subtitles. For soft subtitles, you need to select the subtitle language; otherwise, garbled text may appear. Also note that soft subtitles require support from the video player; some domestic players may not display them or may display garbled text.
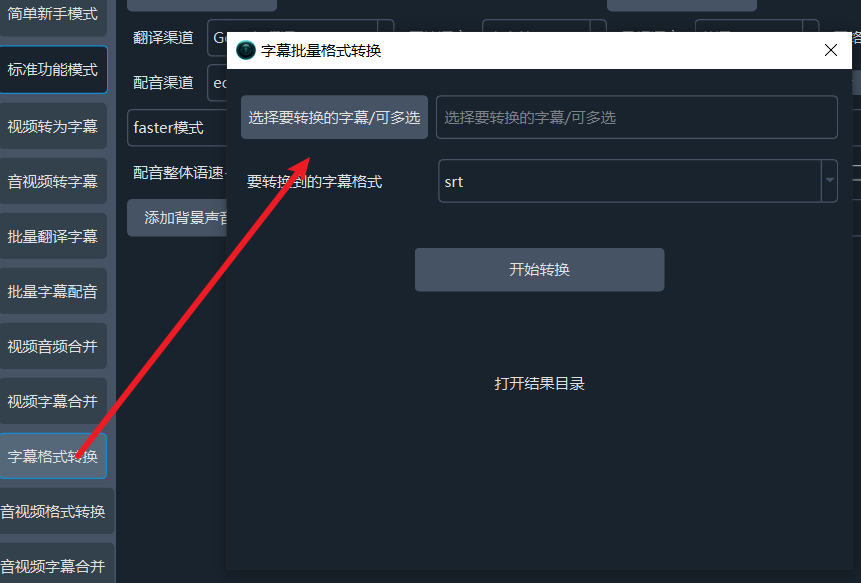
Subtitle Format Conversion
Used to batch convert subtitle files from one format to another, e.g., converting SRT subtitles to ASS or VTT. Supports batch conversion.
Audio/Video Format Conversion
Used to batch convert audio or video files to other formats, e.g., converting wav audio to mp3.
Batch Extract Audio from Videos
If you have a large number of videos and want to extract the audio as separate audio files, you can use this feature.
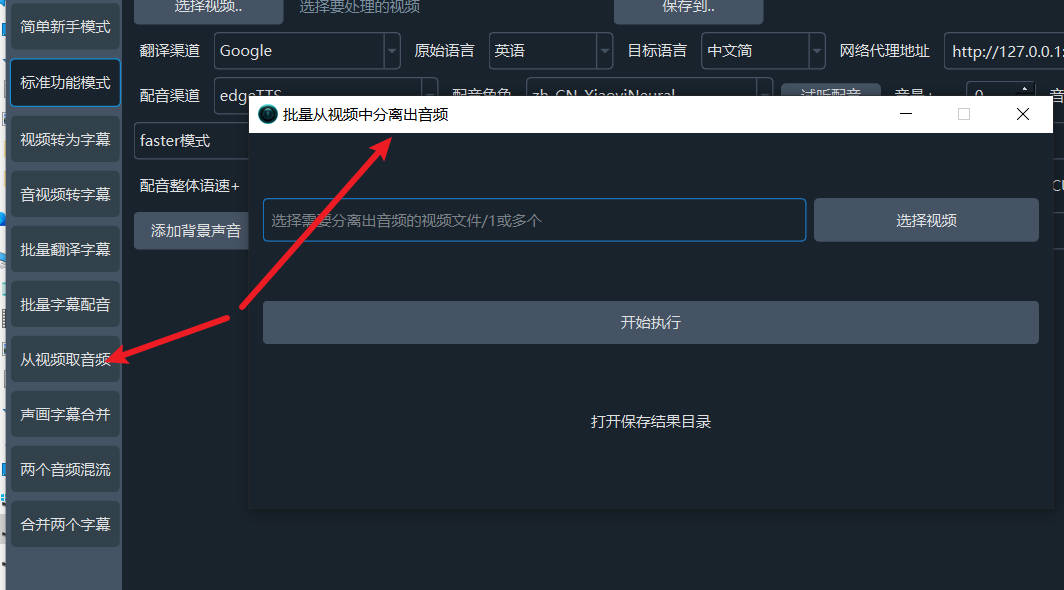
How to Use
In the software menu -> Tools, select "Extract Audio from Video." In the pop-up interface, select the video file(s) (one or multiple).
Click "Start Execution." After completion, click "Open Result Directory."
Separate Vocals and Background Music
The software includes a simple tool for separating vocals and background music. For smaller videos, you can use this tool to separate human speech and background music into two files.
Click Menu -> Tools/Options -> Vocal/Background Separation to open the interface shown below.

Click "Select Audio/Video File" to choose the file you want to separate. Then click the "Start Separation" button. Note that the separation process is relatively slow and time-consuming. If your video is large, consider using dedicated vocal/background separation tools. For a specific tutorial, see Vocal and Background Separation Tool.
Batch Add Image Watermark to Videos
Open Menu -> Tools -> Add Watermark to Video to display the interface as shown below.
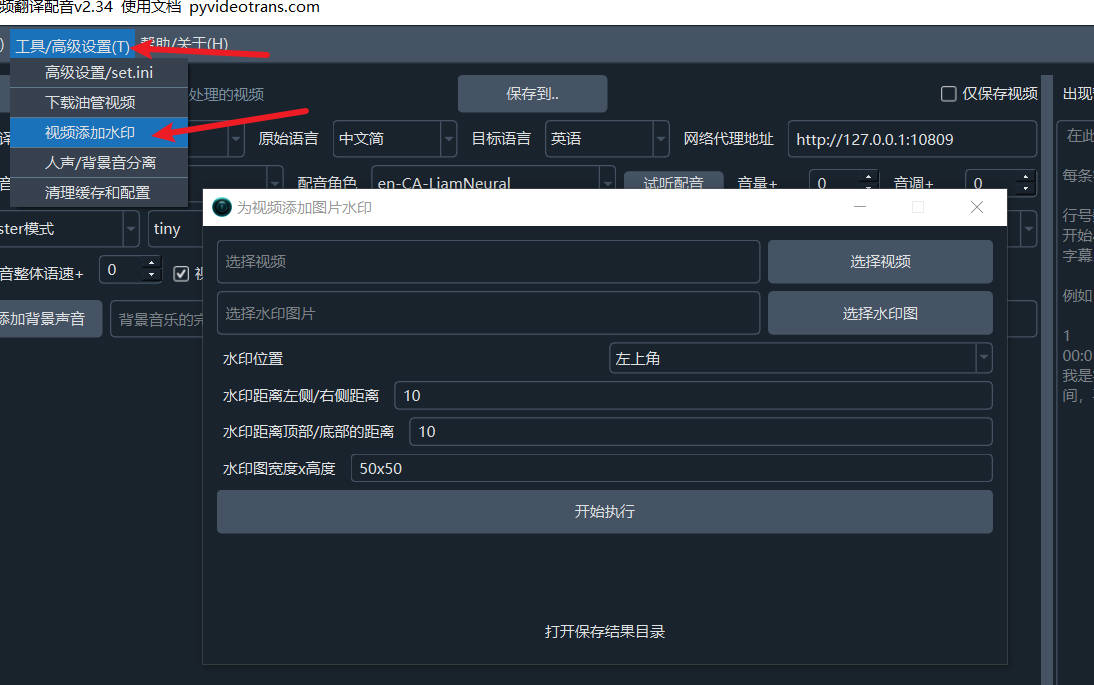
- Select the video file(s) to add the watermark to (one or multiple).
- Select the watermark image.
- Choose the watermark position: Top Left, Top Right, Bottom Right, Bottom Left, or Center of Video.
- Set the margin distance from the top/bottom edges and from the left/right edges. Default is 10 pixels.
- Set the watermark size. It is recommended to pre-process the image dimensions and set this size to the actual image size to prevent distortion. Default is 50x50 (width 50px, height 50px).
- Click "Start Execution," wait for completion, and then open the result save directory to see the output files.