Zero-to-Running! Qwen3-TTS Voice Synthesis/Cloning Windows Package Tutorial
Introduction
Qwen3-TTS is an extremely powerful voice synthesis (TTS) model that can not only generate speech from text, but also clone your voice and even design a completely new voice from a text description!
Deploying this kind of open-source large model typically requires a complex Python environment and various dependency installations, creating a high barrier for non-technical users.
This package is a one-click Windows 10/11 package:
- No manual Python installation needed
- No complex environment variable configuration needed
- Built-in environment management tool (uv.exe)
- Automatic model download (configured with a fast mirror)
Just download, extract, and double-click to get started!
Prerequisites
| Requirement | Details |
|---|---|
| Operating System | Windows 10/11 |
| Disk Space | 10GB+ recommended |
| Hardware | CPU works; NVIDIA GPU enables acceleration (10x faster) |
Step 1: Download and Extract
- Download the package:
【Important】 Extract to a path without Chinese characters or spaces (e.g.,
D:\AI\QwenTTS)- Bad example:
C:\Users\ZhangSan\Desktop\New Folder - Good example:
D:\Tools\Qwen-TTS
- Bad example:
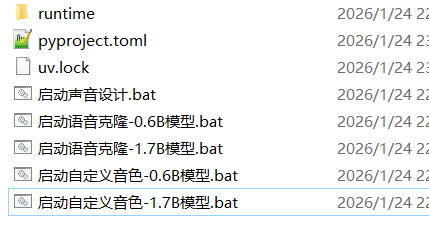
Open the folder — you should see the following file structure:
Step 2: Install the Runtime Environment (one-time only)
After downloading and extracting, double-click 0解压后立即点此安装运行环境.bat (Install runtime environment immediately after extraction). This only needs to be run once.
Step 3: Choose a Function (5 startup scripts)
The folder contains 5 .bat files, each for a different function and model size. Choose based on your hardware and needs:
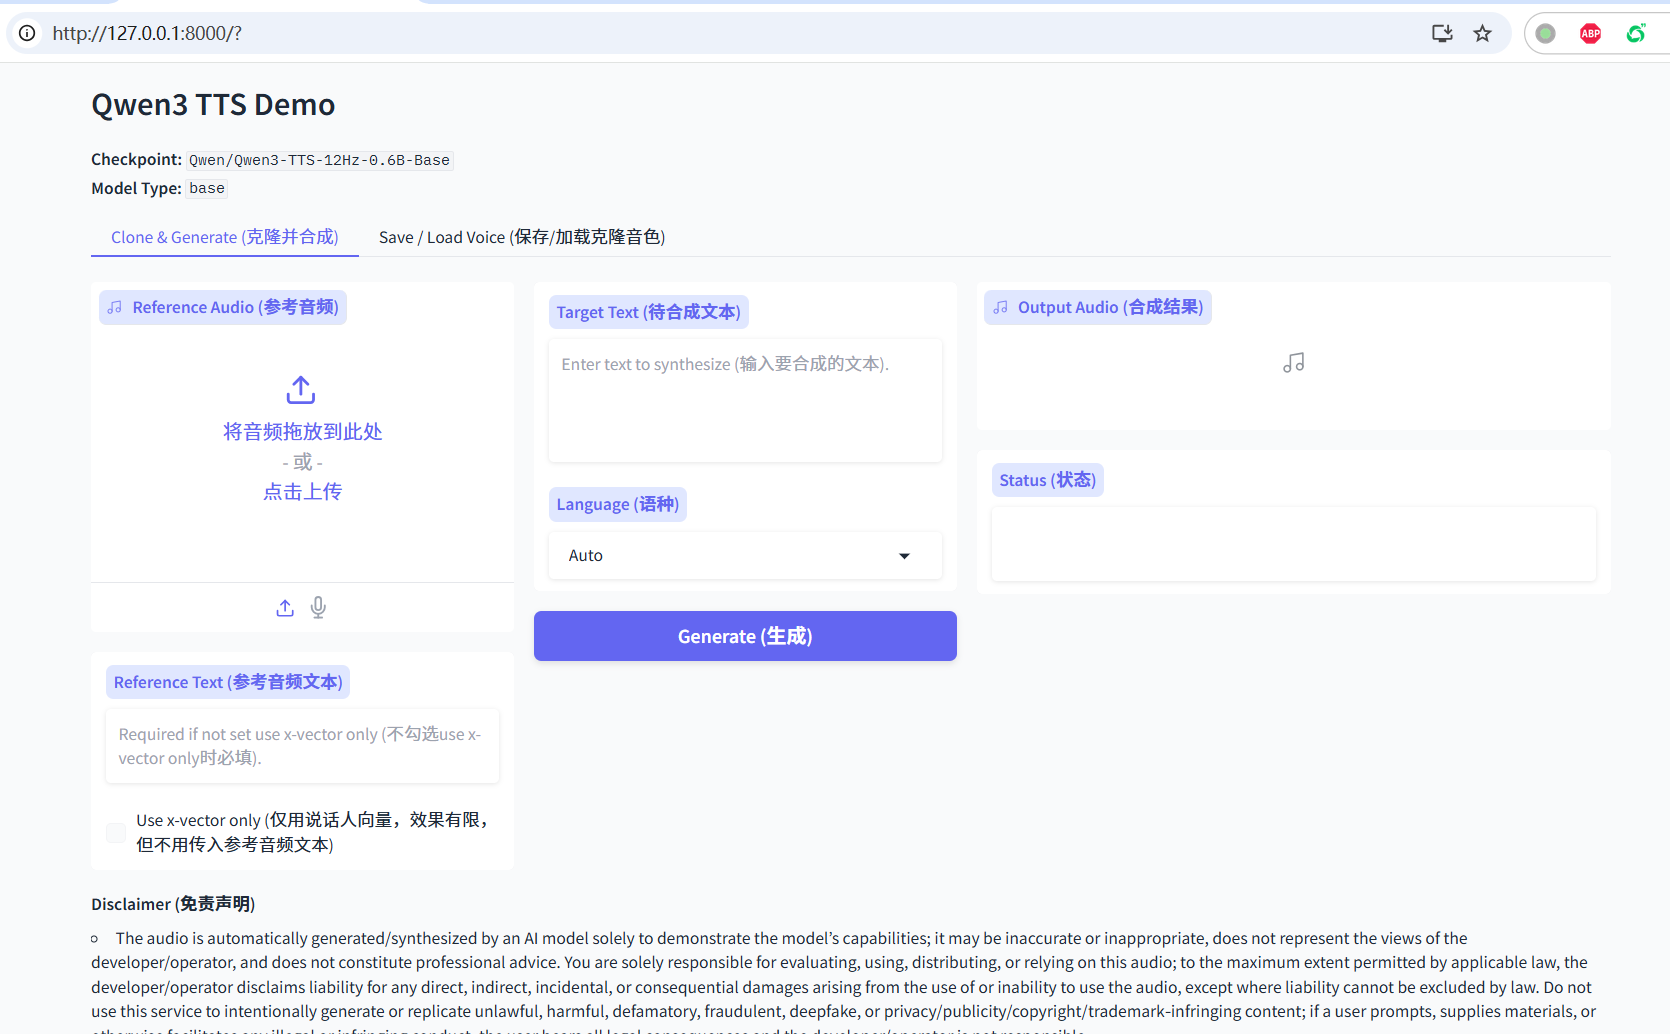
1. Voice Cloning Mode (based on reference audio)
This mode lets you upload a 3–10 second reference audio clip, and the AI will mimic that voice to speak.
| Startup Script | Features |
|---|---|
| 启动语音克隆-0.6B模型.bat (Voice Clone - 0.6B) | Faster, lower hardware requirements, good for trying out |
| 启动语音克隆-1.7B模型.bat (Voice Clone - 1.7B) | Better quality, more realistic, slightly slower |
2. Voice Design Mode
This mode doesn't need reference audio — you describe the voice in text, e.g., "a deep, magnetic middle-aged male voice."
| Startup Script | Features |
|---|---|
| 启动声音设计.bat (Voice Design) | Uses 1.7B model, create unique voices with text prompts |
Note: Voice Design mode cannot be used in pyVideoTrans — it only works in the WebUI.
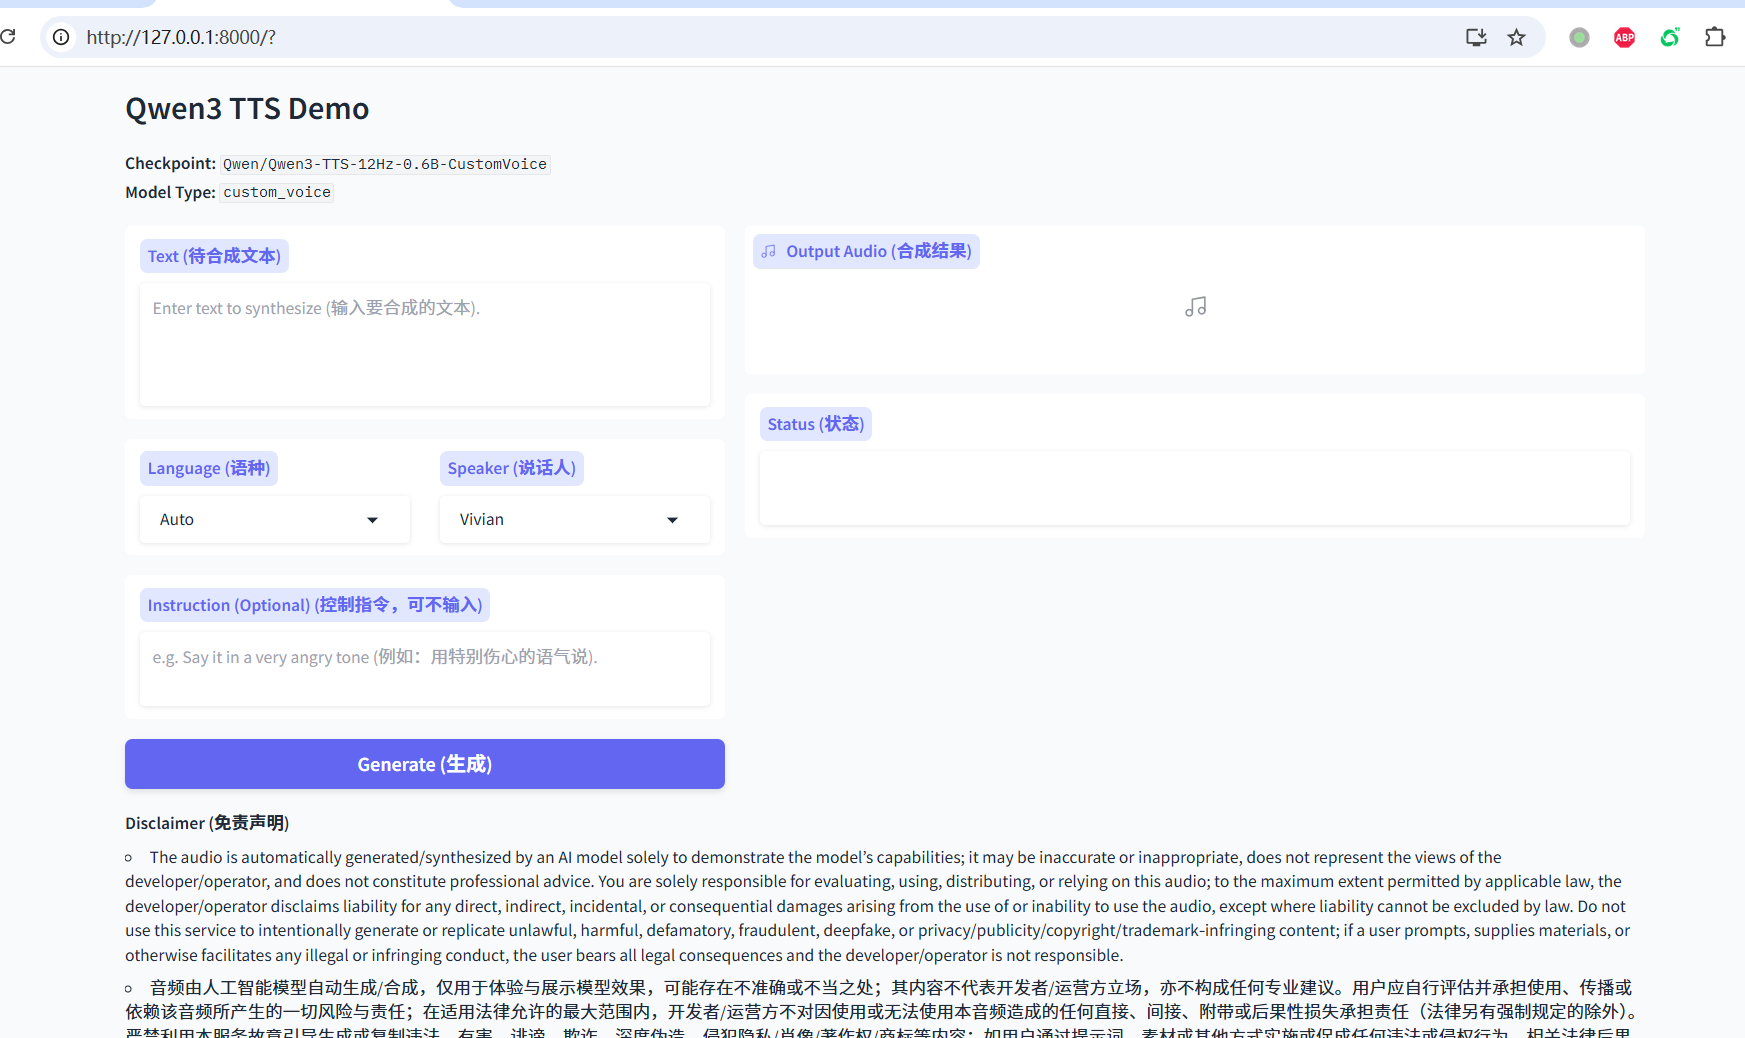
3. Custom Voice Mode (built-in preset characters)
This mode includes preset high-quality voices like Vivian, Uncle_fu, and Sohee — stable and pleasant sounding.
| Startup Script | Features |
|---|---|
| 启动自定义音色-0.6B模型.bat (Custom Voice - 0.6B) | Faster |
| 启动自定义音色-1.7B模型.bat (Custom Voice - 1.7B) | Better quality |
Note: In this mode, you cannot use reference audio — you can only select characters from the dropdown menu.
Step 4: Start and Auto-Configure
- Double-click your chosen
.batfile - A black command-line window will appear — do not close it!
- On first run, the tool will automatically configure the environment and download model files
- A China mirror (hf-mirror.com) is built in for faster downloads
- Depending on your connection speed, this may take several minutes to over ten minutes — please be patient
- When you see the following text in the black window, startup is complete:
* To create a public link, set `share=True` in `launch()`.
Step 5: Start Using
- Open a browser (Chrome or Edge recommended)
- Enter in the address bar:
http://127.0.0.1:8000and press Enter - You'll see the Qwen3-TTS interface:
- Input box: Enter the text you want the AI to read
- Reference Audio / Prompt: Upload audio or enter a description, depending on the mode you started
- Generate: Click the button to generate speech
Using in pyVideoTrans
Voice Cloning Mode
- Configure reference audio in pyVideoTrans (Menu → TTS Settings → Qwen-tts (Local))
- Select "Qwen3-TTS" from the "TTS Channel" dropdown on the main screen
- Select "clone" from "Dubbing Character" to use reference audio cloning
Custom Voice Mode
- Configure the Qwen3-TTS address in pyVideoTrans
- Select "Qwen3-TTS" from the "TTS Channel" dropdown on the main screen
- Select a built-in voice (e.g., Vivian, Serena) from "Dubbing Character"
Error Messages
Error
Cannot find a function with api_name: /run_voice_clone: You're using theclonecharacter or reference audio in pyVideoTrans, but you didn't start a voice cloning model. StartQwen3-TTS-12Hz-0.6B-BaseorQwen3-TTS-12Hz-1.7B-Base.Error
Cannot find a function with api_name: /run_instruct: You're using a built-in voice, but you didn't start the custom voice model. StartQwen3-TTS-12Hz-0.6B-CustomVoiceorQwen3-TTS-12Hz-1.7B-CustomVoice.Error when starting VoiceDesign model: pyVideoTrans only supports voice cloning and custom voice models, not the voice design model.
Advanced: Enable GPU Acceleration
By default, the configuration is set to CPU mode to ensure it works on all computers.
If you have an NVIDIA GPU with CUDA installed, follow these steps for 10x+ inference speed:
Step 1: Install CUDA PyTorch
In the folder containing the bat files, clear the address bar, type cmd, press Enter, then run:
CUDA 12.x:
runtime\python -m pip install --force-reinstall torch torchaudio --index-url https://download.pytorch.org/whl/cu128CUDA 13.x:
runtime\python -m pip install --force-reinstall torch torchaudio --index-url https://download.pytorch.org/whl/cu130Step 2: Edit the Startup Script
- Right-click the
.batfile you want to modify, select "Edit" (or open with Notepad) - Find the last line containing:
--device cpu --dtype float32- Delete this line (remove
--device cpu --dtype float32) - Save the file and double-click to run again. The program will automatically use GPU acceleration.
Reference Audio Requirements
| Item | Requirement |
|---|---|
| Format | WAV (recommended) |
| Duration | 3–10 seconds |
| Content | Clear pronunciation, no background noise |
| Location | f5-tts folder under pyVideoTrans root directory |
Troubleshooting
1. Window flashes and closes immediately?
Check whether the extraction path contains Chinese characters or spaces. Make sure the VC++ runtime is installed (usually present on gaming PCs).
2. Generation is very slow?
CPU mode is naturally slower than GPU. If you have an NVIDIA GPU, follow the "Advanced: Enable GPU Acceleration" section. The 1.7B model being slower than 0.6B is normal.
3. Stuck on first startup?
The tool is downloading models, which are several gigabytes. Check the black window for progress bars or download indicators. As long as no errors appear, please be patient.
4. Model download failed?
The default download source is hf-mirror.com. If it still fails:
- Check your network connection
- Try accessing huggingface.co
- Manually download model files to the
modelsdirectory
5. Error Cannot find a function with api_name: /run_voice_clone?
You're using the clone character or reference audio dubbing in pyVideoTrans, which requires the voice cloning model (Base model), but you started a different model (e.g., custom voice model or voice design model). Switch to the correct startup script.