The tool supports batch functionality in the following 4 areas: Batch Video Translation + Dubbing, Batch Subtitle-to-Speech Synthesis, Batch Subtitle File Translation, and Batch Subtitle Recognition from Audio/Video.
Batch Video Translation + Dubbing
In the software interface, click "Select Video" to choose multiple videos for processing. Then set the source language, target language, and dubbing voice. Click "Start" to process all selected videos sequentially.

Batch Subtitle-to-Speech Synthesis
Click the "Subtitle-to-Speech Synthesis" button on the left. In the opened interface, click to select one or more SRT subtitle files.

The tool will automatically synthesize speech for all selected subtitles one by one. After completion, click "Open Directory" in the bottom right corner to view the saved results.

Batch Subtitle Translation
This is a new feature added in version 1.48. First, ensure you have downloaded the 1.48 upgrade patch package, then extract and overwrite the old files with it.
Select "Batch Subtitle Translation" on the left, choose one or more SRT subtitle files, configure the translation settings, and click "Start". Wait for the process to complete automatically.
Similarly, after completion, click "Open Result Save Directory" to see all the translated SRT files.

Batch Subtitle Recognition from Audio/Video
Click "Audio/Video to Text" on the left, then select one or more audio or video files. After setting the relevant parameters, click "Start" to process all selected files one by one.

After processing, click "Open Recognition Result Directory" at the bottom to open the location where results are saved.

Batch Video Watermark Addition with Images
Go to Menu -> Tools -> Add Watermark to Video. The interface is shown below.
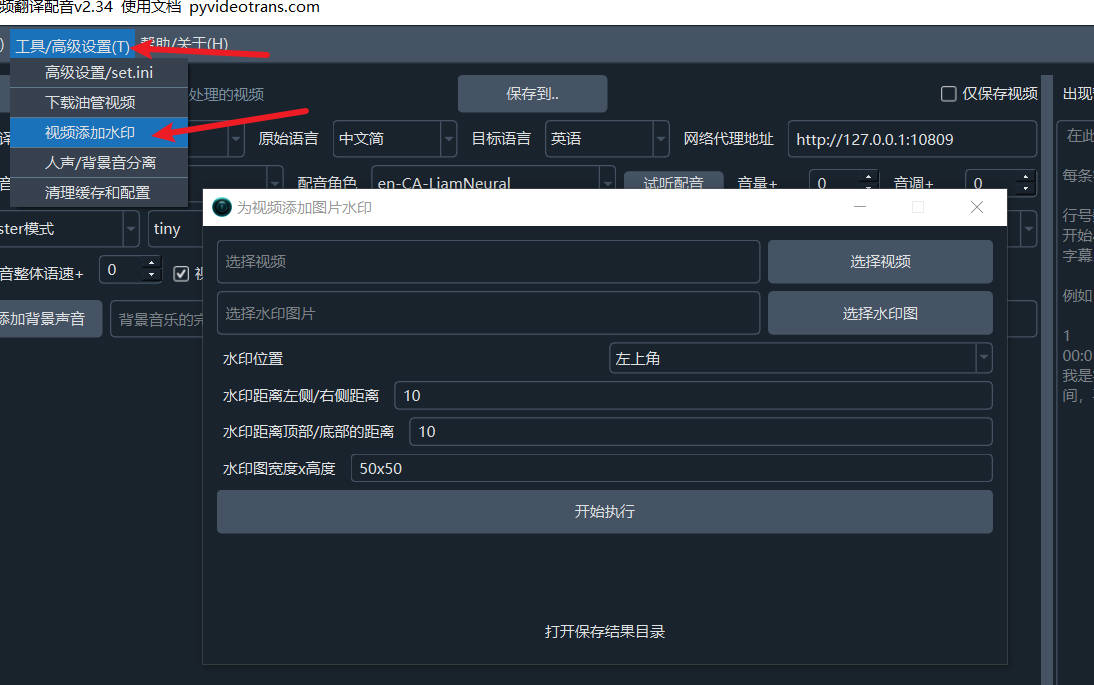
- Select the video file(s) to add a watermark to. You can choose one or multiple files.
- Select the watermark image.
- Choose the watermark position: Top Left, Top Right, Bottom Right, Bottom Left, or Center of the video.
- Set the margin distance from the top/bottom edges and from the left/right edges. The default is 10 pixels.
- Set the watermark size. It is recommended to pre-process the image dimensions and set this size to the actual image size to prevent distortion. The default is 50x50 (width 50px, height 50px).
- Click "Start Execution". Wait for completion, then open the result save directory to view the output files.