MegaTTS3 is an open-source Chinese/English voice cloning project from ByteDance with impressive results. However, the official installation documentation is somewhat brief, and many users have reported difficulties installing it, especially on Windows. This tutorial aims to help you overcome these hurdles and successfully install and use MegaTTS3 on Windows.
Before we begin, let's clarify a few basic concepts used throughout this tutorial:
- CMD Console (Command Prompt):
- How to open: In the address bar of the folder you want to work in (e.g.,
D:/python/megatts3), delete the current path, typecmd, and press Enter.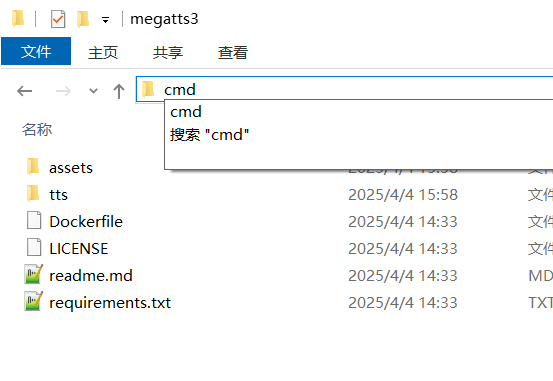
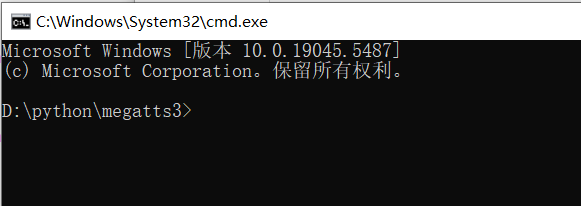
- Purpose: A black window will pop up; this is the CMD console. All commands mentioned in this tutorial are entered and executed here by pressing Enter.
- How to open: In the address bar of the folder you want to work in (e.g.,
- Executing Commands:
- Type a specific line of text (the "command") into the CMD console and press Enter.
Initial Installation & Configuration
Strong Recommendation: Use
Minicondato deploy MegaTTS3 on Windows to avoid many unnecessary issues. This tutorial is based onMiniconda. Example Path: This tutorial assumes your working directory (where MegaTTS3 is installed) isD:/python/megatts3. If your path is different, modify the paths in the commands accordingly.
Step 1: Install Miniconda
Download Miniconda:
- Visit in your browser:
https://www.anaconda.com/download/success#miniconda - Find the
Miniconda Installerssection on the page and click the download link.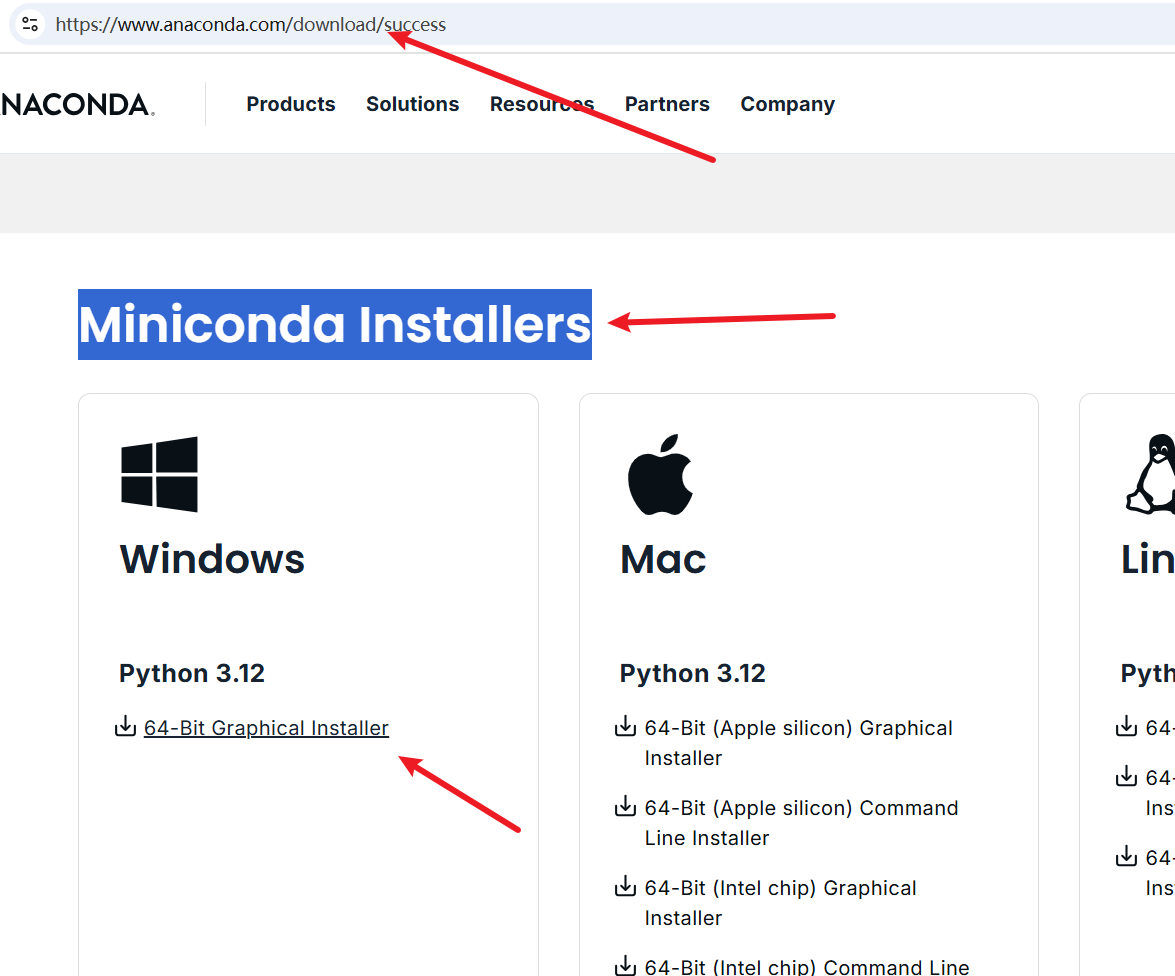
- Visit in your browser:
Install Miniconda:
- Double-click the downloaded
.exeinstaller. - Click
Nextthrough the steps, and clickI Agreeon the license agreement page.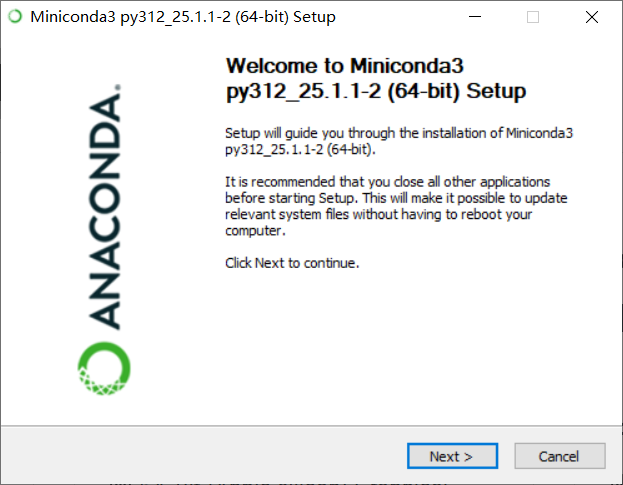
- Crucial Step: During the installation options, you must check the second checkbox: "Add Miniconda3 to my PATH environment variable". Ignore the red warning text next to it; please check it.
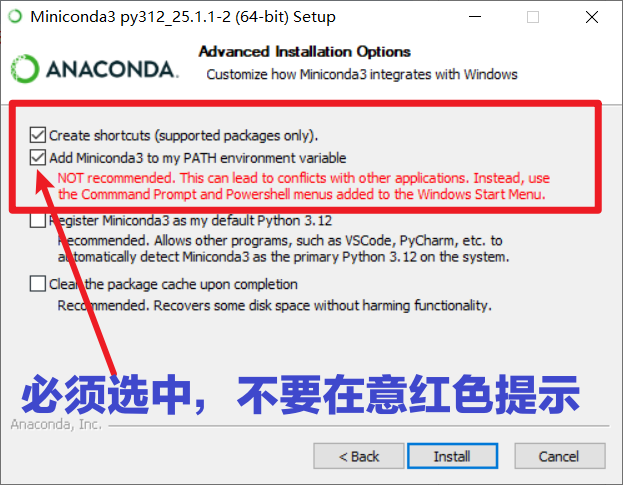
- Continue clicking
NextorInstalluntil the installation is complete.
- Double-click the downloaded
Step 2: Download MegaTTS3 Source Code
Visit the Official Repository:
- Open the URL
https://github.com/bytedance/MegaTTS3
- Open the URL
Download the Code:
- Click the green
<>Codebutton, then selectDownload ZIP. 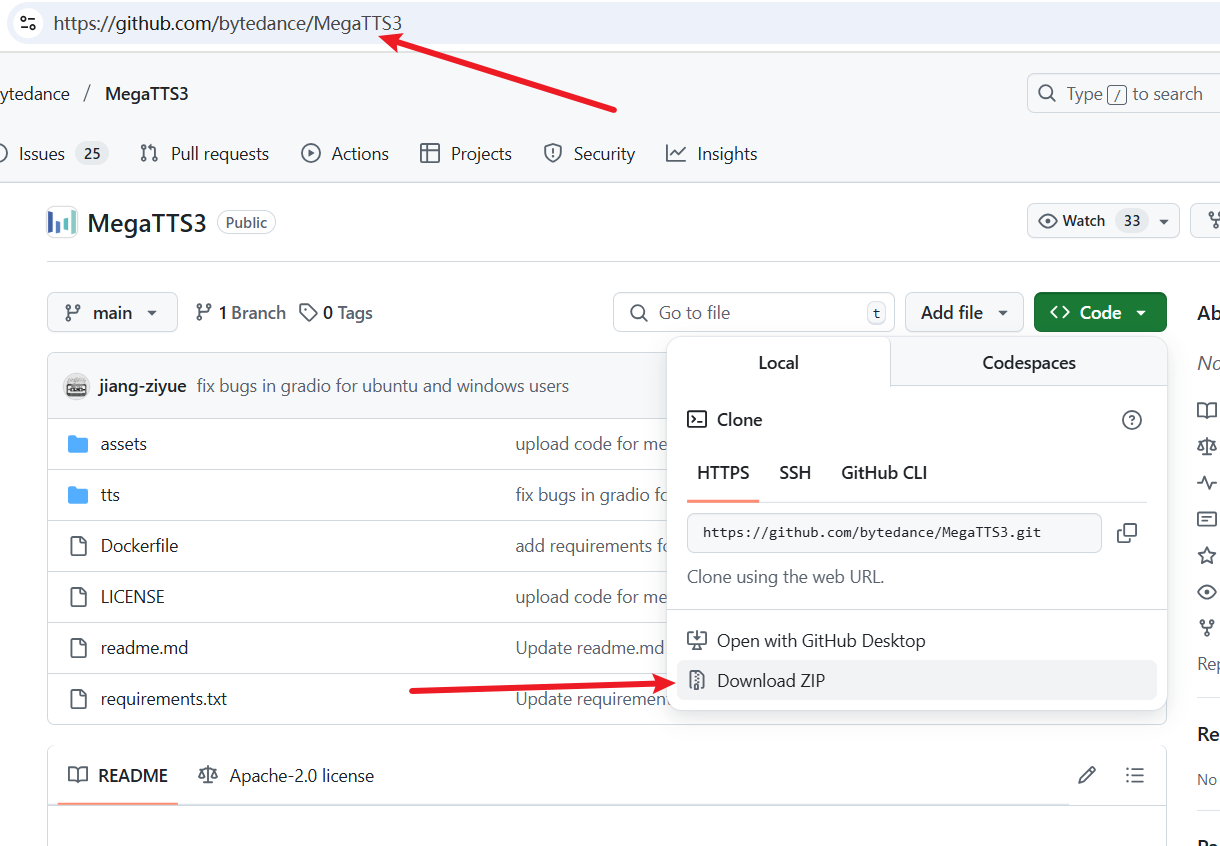
- Click the green
Extract and Place Files:
- Extract the downloaded
MegaTTS3-main.zipfile. - Copy all files and subfolders inside the extracted
MegaTTS3-mainfolder to your prepared working directory, e.g.,D:/python/megatts3.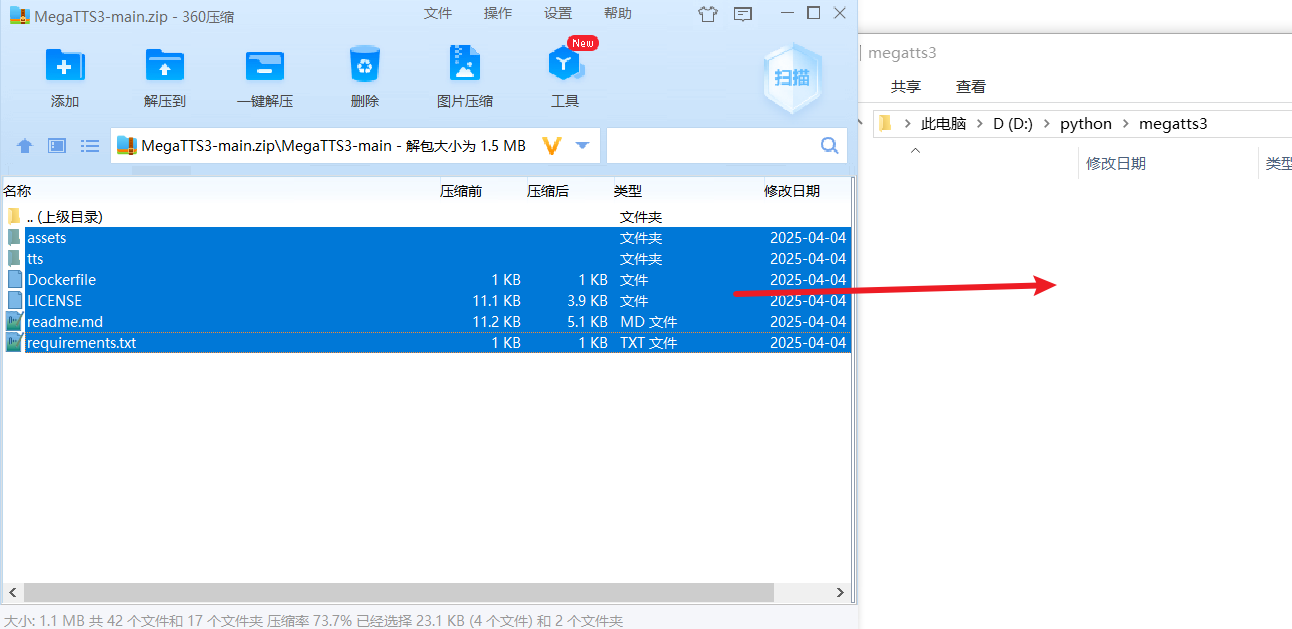
- After copying, the
D:/python/megatts3folder should contain folders likeassets,checkpoints,tts, etc.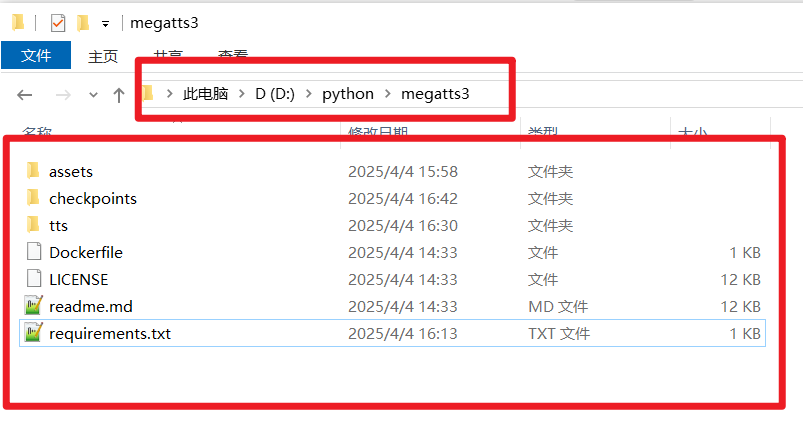
- Extract the downloaded
Step 3: Create and Activate a Virtual Environment
Open CMD Console:
- Navigate to your working directory
D:/python/megatts3. - Type
cmdin the address bar and press Enter.
- Navigate to your working directory
Create Virtual Environment:
- In the CMD console, enter the following command to create an environment named
megatts3envusing Python 3.10:
- In the CMD console, enter the following command to create an environment named
conda create -n megatts3env python=3.10 During installation, if prompted with
 Proceed ([y]/n)?, type y and press Enter. 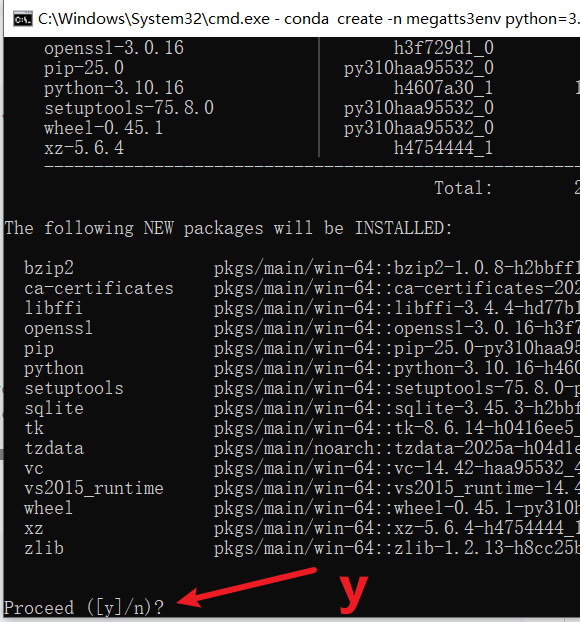
- Activate Virtual Environment:
- After creation, enter the following command to activate the environment (you must execute this step to activate the virtual environment every time before running MegaTTS3):
conda activate megatts3env
Upon successful activation, the command prompt will display (megatts3env) at the beginning.

Note: All following installation and run commands must be executed in a CMD console where the (megatts3env) environment is activated!
Step 4: Install Dependencies
Special Note: Installing directly according to the official repository documentation on Windows will typically fail. Please strictly follow the order below.
Install pynini:
- In the activated CMD console, enter and execute:bash
conda install -y -c conda-forge pynini==2.1.5 - Wait for the command to complete.
- In the activated CMD console, enter and execute:
Install WeTextProcessing 1.0.3:
- Continue in the CMD console and execute:bash
pip install WeTextProcessing==1.0.3 - Wait for the command to complete.
- Continue in the CMD console and execute:
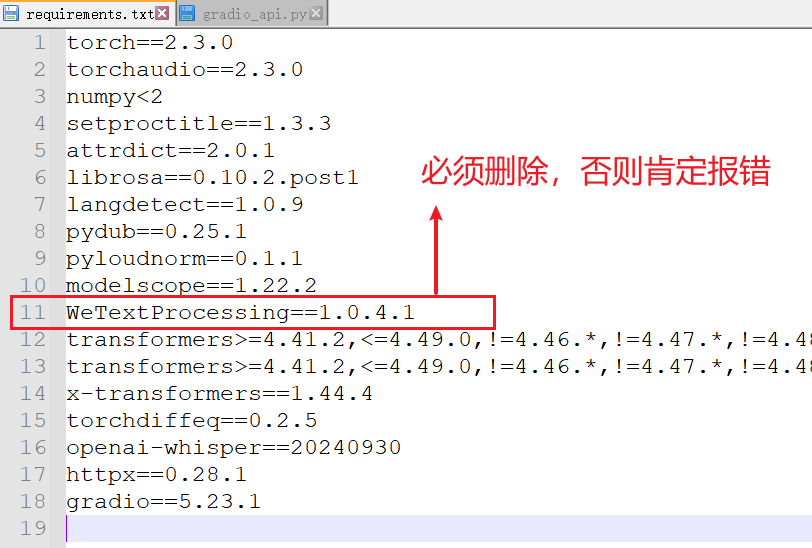
Modify requirements.txt and Install Remaining Dependencies:
- Open the
requirements.txtfile in your working directory (D:/python/megatts3) with Notepad or another text editor. - Find and delete the line containing
WeTextProcessing==1.0.4.1. - Save and close the file.
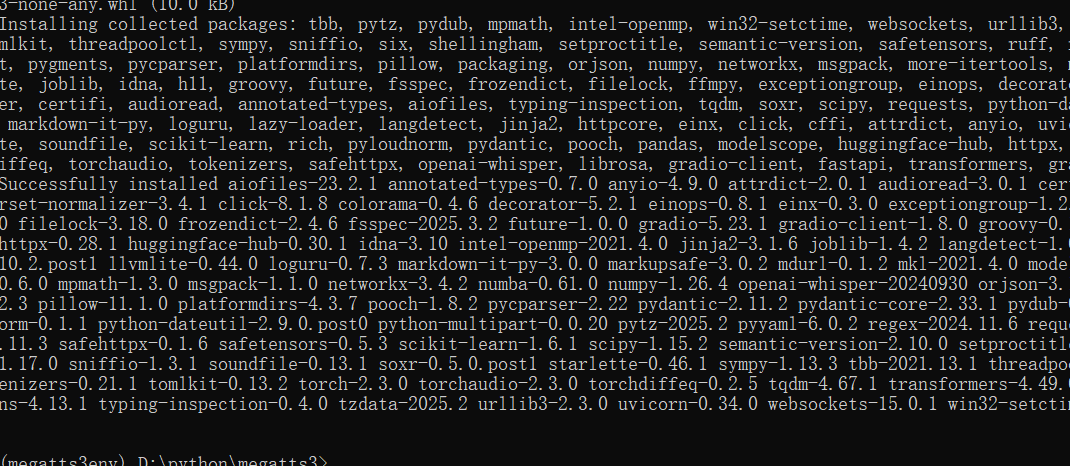
- Return to the CMD console and execute the following command to install the remaining dependencies:bash
pip install -r requirements.txt
- Open the
- Set Environment Variable:
- Copy the entire line below, paste it into the CMD console, and press Enter to execute. Note: If your installation directory is not
D:/python/megatts3, modify the path in the command to your actual path.bashconda env config vars set PYTHONPATH="D:/python/megatts3;%PYTHONPATH%" - After successful setting, you need to close the current CMD window, then open a new CMD window, and reactivate the environment
conda activate megatts3envfor the environment variable to take effect.
- Copy the entire line below, paste it into the CMD console, and press Enter to execute. Note: If your installation directory is not
Check: If none of the above steps produced errors (ignore yellow WARN messages), the dependency environment is successfully installed. If you encounter red errors, carefully check if you followed the order precisely, especially whether you correctly modified the requirements.txt file.
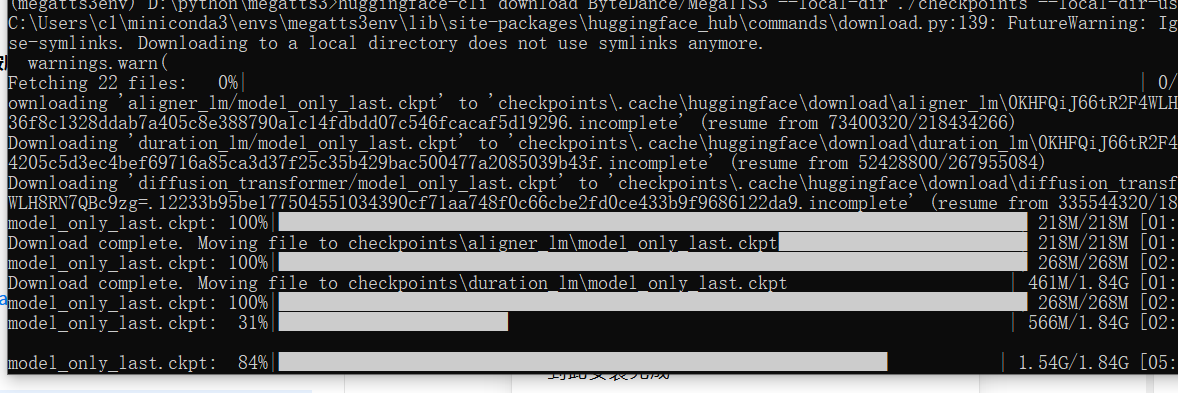
Step 5: Download Pre-trained Models
Hint: Model files are hosted on Hugging Face Hub, which is inaccessible from within China without a VPN.
- Ensure your CMD console is in the activated
(megatts3env)state. - Execute the following command to download the model files to the
checkpointsfolder in your working directory:bashhuggingface-cli download ByteDance/MegaTTS3 --local-dir ./checkpoints --local-dir-use-symlinks False - Wait patiently for the download to complete.
Step 6: (Optional) Add GPU Acceleration Support
If your computer has an NVIDIA GPU and CUDA 12.x is installed, you can install the GPU version to accelerate speech synthesis.
- Ensure the CMD console is activated
(megatts3env). - Execute the following command:
pip install --force-reinstall torch torchvision torchaudio --index-url https://download.pytorch.org/whl/cu126That's it! All installation and configuration work is now complete!
Launching the MegaTTS3 Web Service
You need to follow these steps to launch MegaTTS3 every time you want to use it.
Open CMD Console:
- Navigate to your MegaTTS3 working directory (e.g.,
D:/python/megatts3). - Type
cmdin the address bar and press Enter.
- Navigate to your MegaTTS3 working directory (e.g.,
Activate Virtual Environment:
- Execute the command:
conda activate megatts3env
- Execute the command:
(Recommended) Modify Gradio Listening Address:
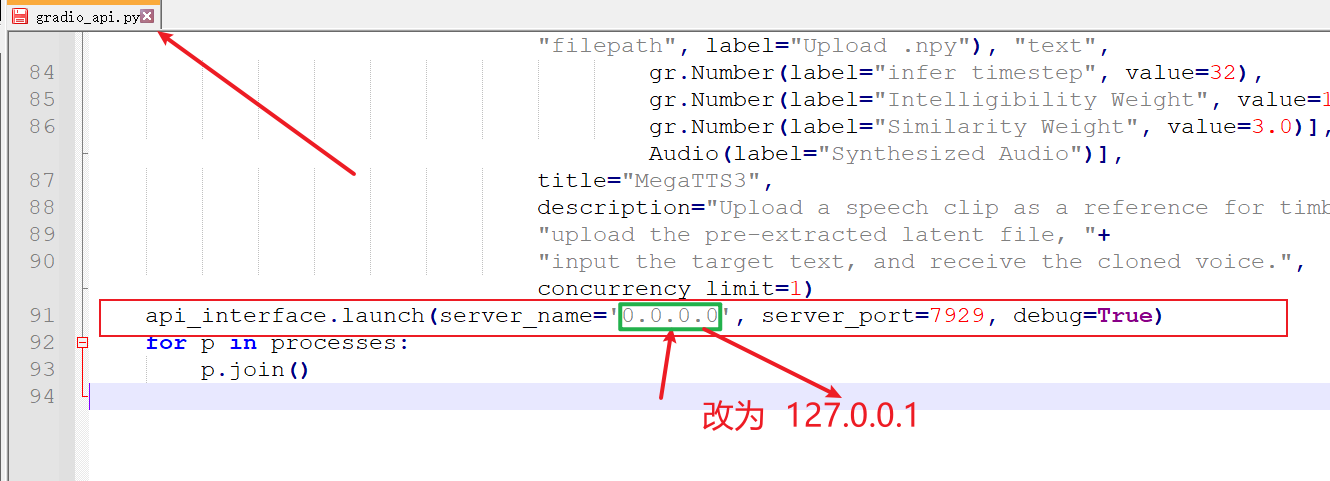
- Strongly recommended before the first launch: Open the file
D:\python\megatts3\tts\gradio_api.pywith a code editor or Notepad. - Scroll to the end of the file, find
server_name="0.0.0.0"and change it toserver_name="127.0.0.1". - Reason: Using
0.0.0.0on Windows may cause numerous irrelevant error messages and even launch failures. Changing it to127.0.0.1is generally more stable. - Save the file after modification.
- Strongly recommended before the first launch: Open the file

- Launch the Program:
- In the activated CMD console, execute:bash
python tts/gradio_api.py
- In the activated CMD console, execute:
- If successful, you will see output in the CMD console similar to below, indicating the service is running:

Access the Web Interface:
- Open this address in your browser:
http://127.0.0.1:7929.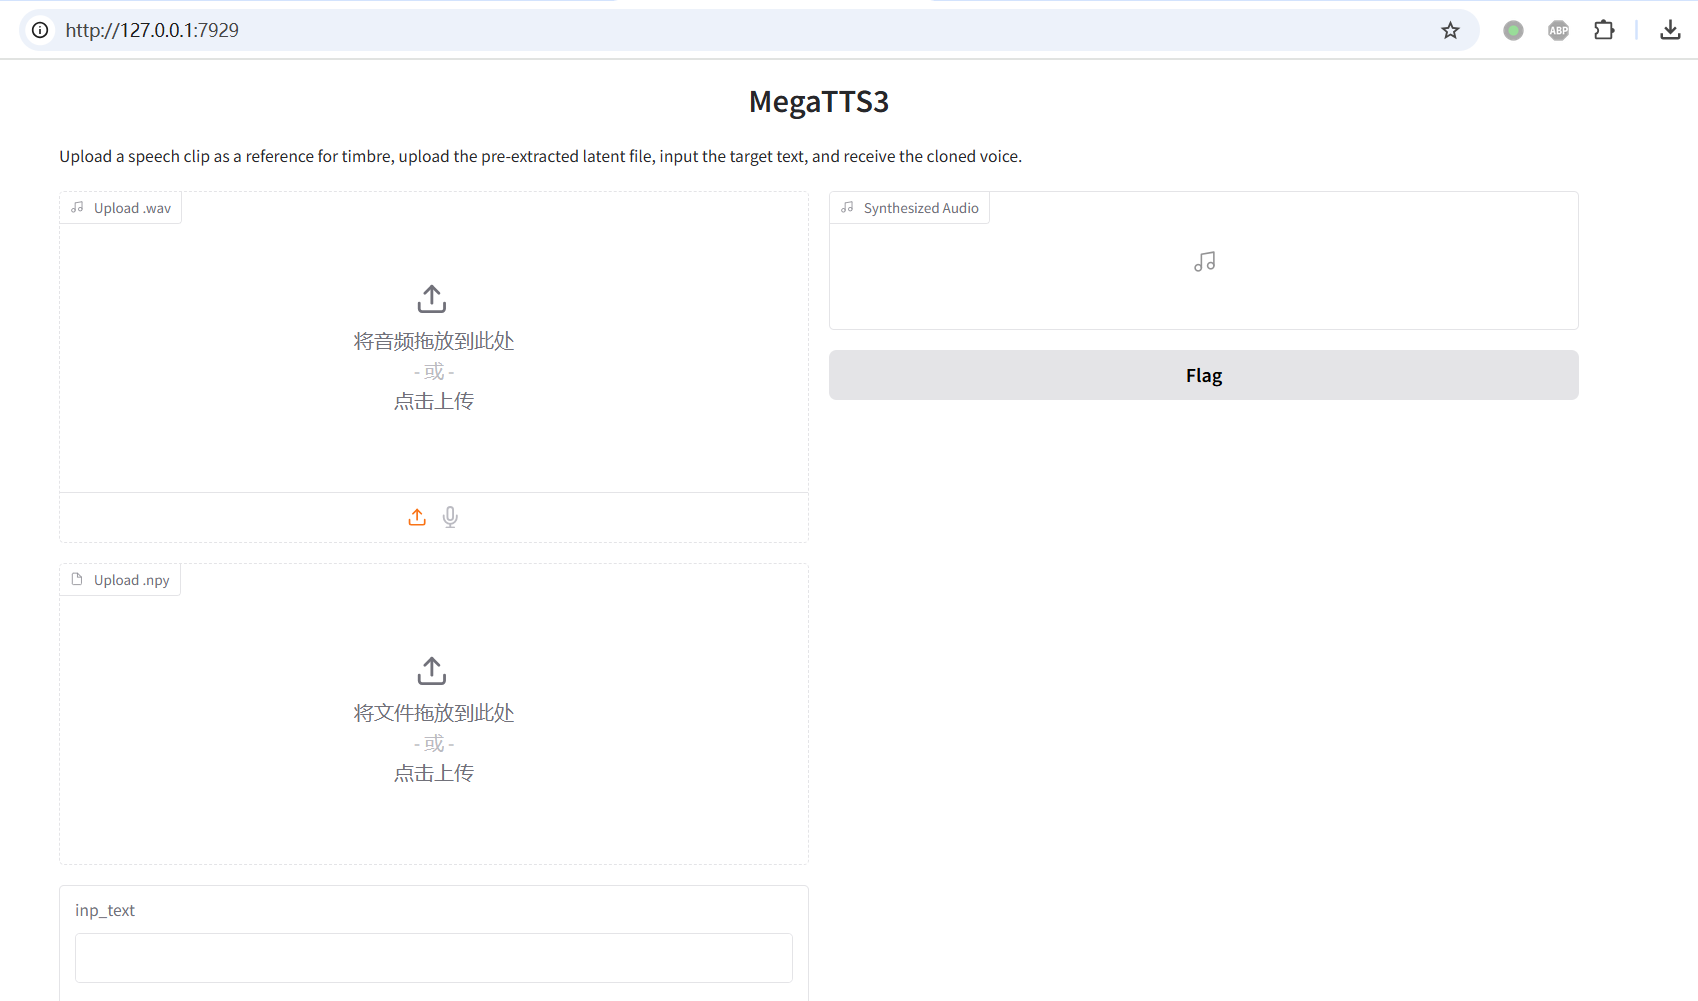
- Open this address in your browser:
Using MegaTTS3 for Voice Cloning
Understanding Voice Source
MegaTTS3 is currently a "semi-open-source" project. This means you cannot clone arbitrary voice samples you provide. You can only use voices (latents) that have been pre-processed and published by ByteDance on a specific page.
- Official Explanation: This is done for security and legal/regulatory reasons.
- If you want to clone your own voice: You need to submit your audio following the official method, wait for their review and placement on the Latents page, and then download it for use. (Specific method detailed below)
Downloading Usable Voice Files
Access the Google Drive Folder:
- You need a VPN to access Google services and a Google account (free to register if you don't have one).
- Open the URL (i.e., the latents page):
https://drive.google.com/drive/folders/1QhcHWcy20JfqWjgqZX1YM3I6i9u4oNlr - There are three subfolders here (
librispeech_testclean_40,official_test_case,user_batch_1-3) containing all currently available voices.
Select and Download Files:
- Enter any folder, browse the
.wavaudio files, listen, and select the voice you want to clone (right-click on a wav file -> Open with -> Preview to listen).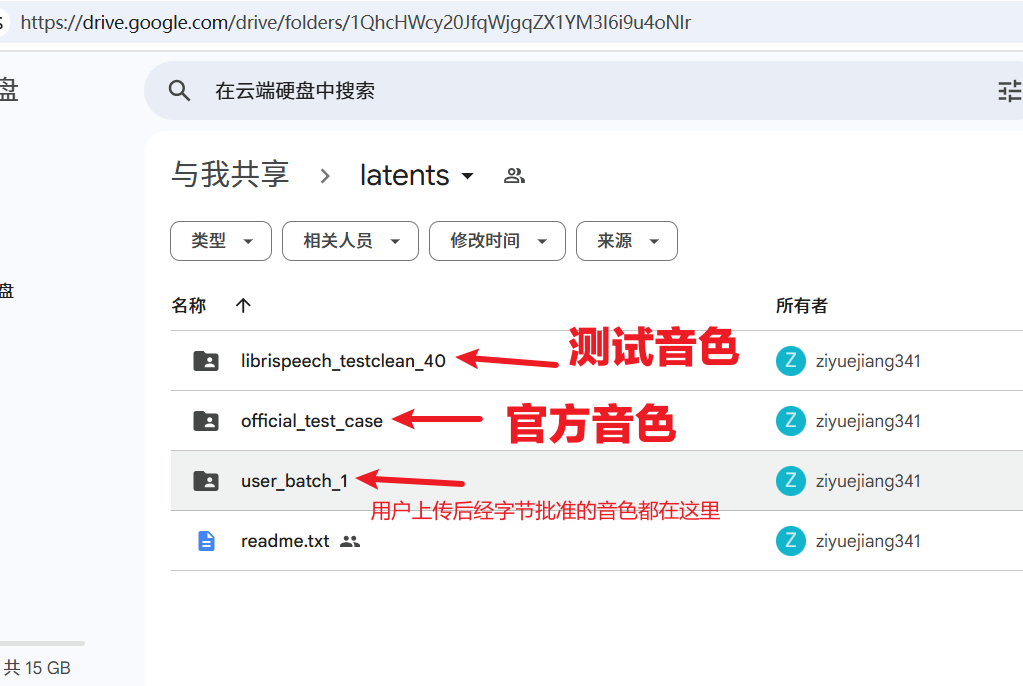
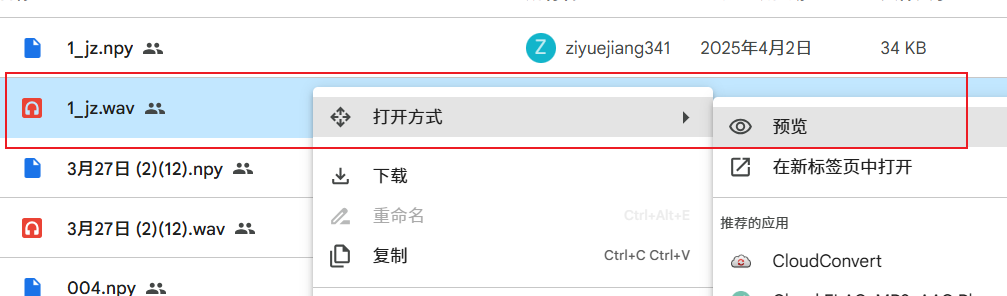
- Important: When you decide to download a
.wavfile (e.g.,speaker_xxx.wav), you must also download the.npyfile with the same name (i.e.,speaker_xxx.npy). These two files are paired and both are required.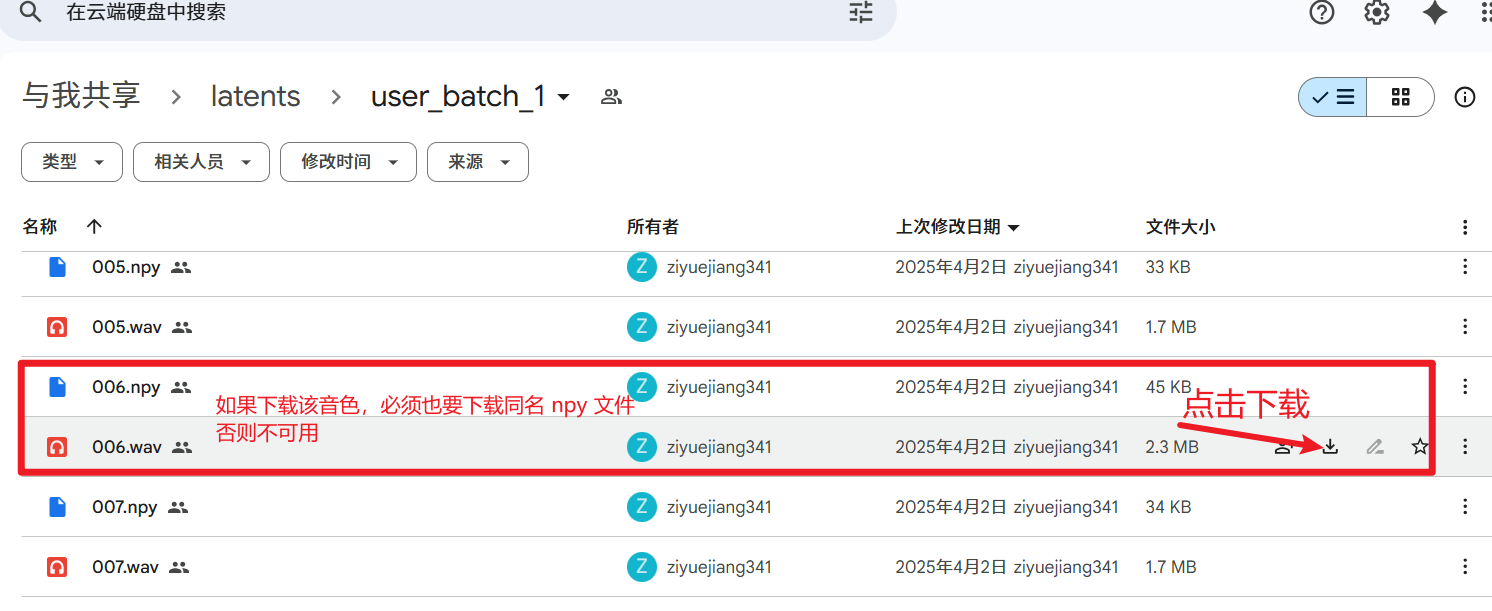
- Save the downloaded
.wavand.npyfiles on your computer.
- Enter any folder, browse the
Synthesizing Speech in the Web Interface
Open the Web Interface:
- Ensure the MegaTTS3 service is running and open
http://127.0.0.1:7929in your browser.
- Ensure the MegaTTS3 service is running and open
Upload Voice Files:
- Find the upload area on the page.
- Click the "Upload.wav" area and select the
.wavfile you just downloaded. - Click the "Upload.npy" area and select the
.npyfile with the same name as the.wavfile.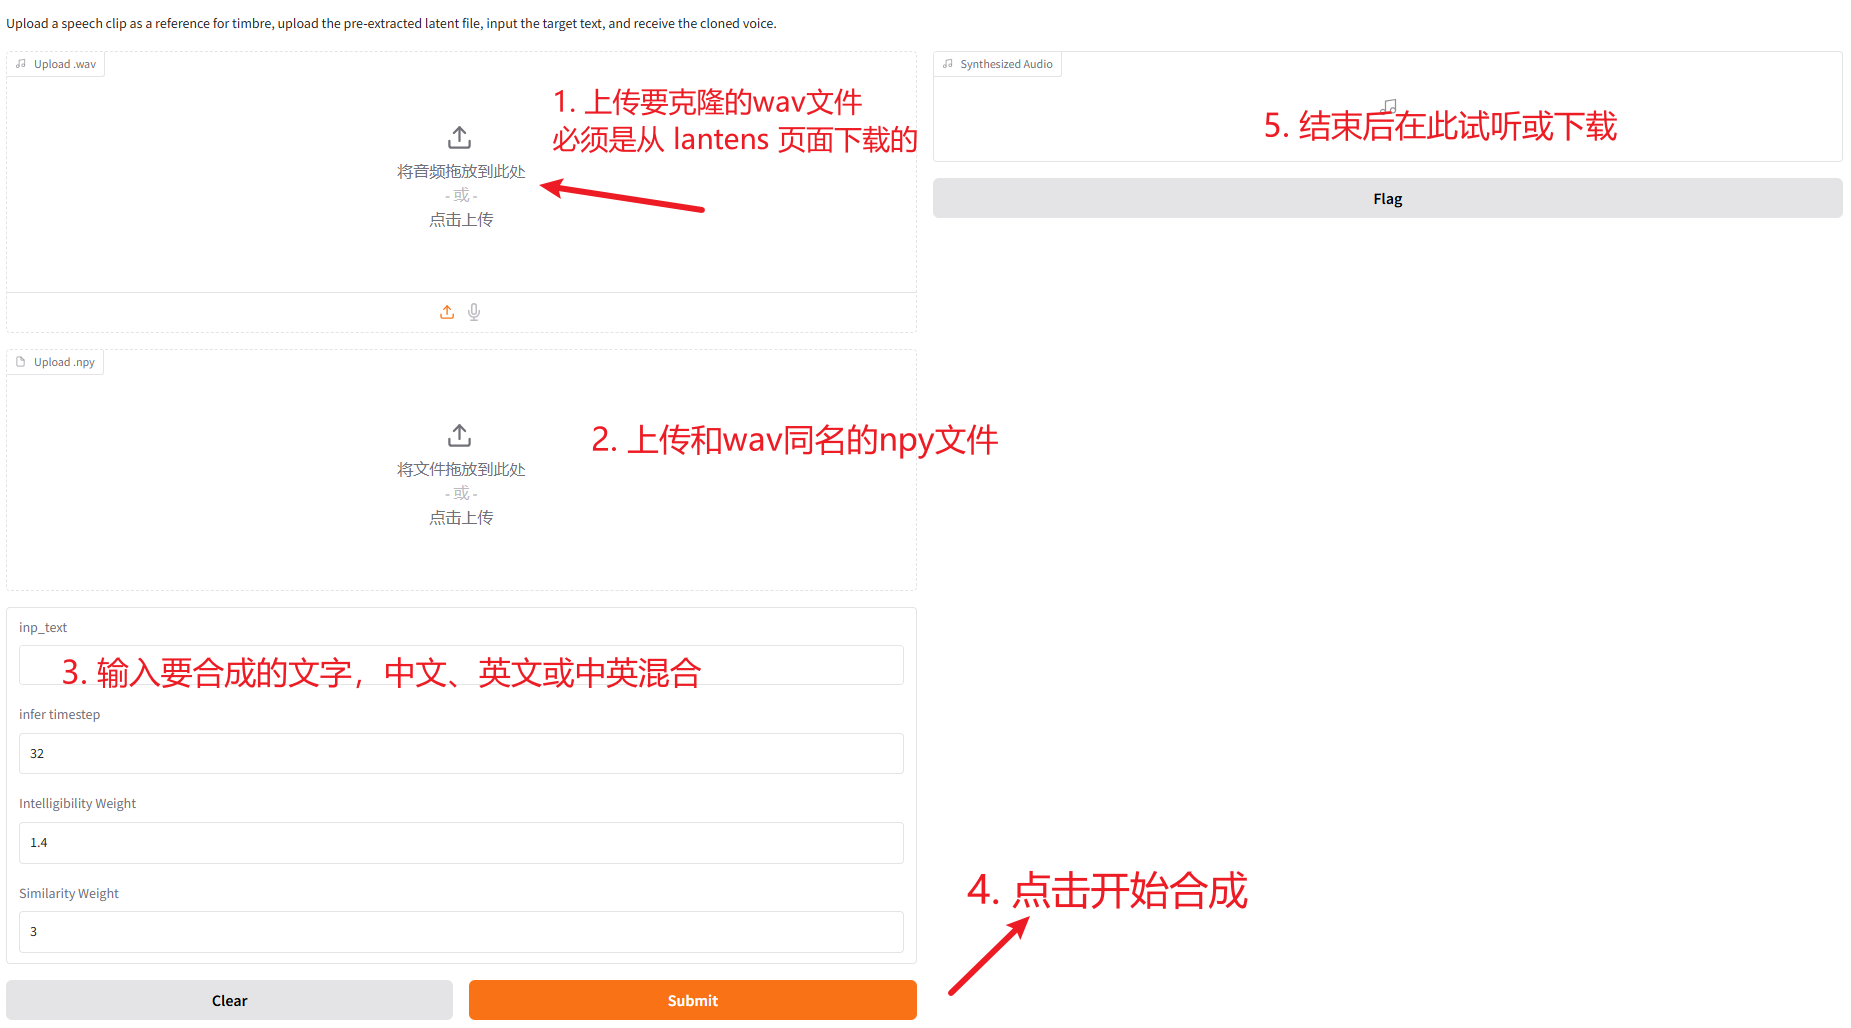
Input Text and Synthesize:
- In the "Input Text" box, enter the Chinese or English text you want this voice to speak.
- Click the "Submit" button to execute.
Get Results:
- Wait a short while; synthesis happens in the background.
- Once complete, you can directly play the generated speech in the top-right corner or find the download button to save it as an audio file.
Congratulations! You have now successfully installed and used MegaTTS3 for voice cloning on Windows!
Submitting Your Own Voice for Cloning
If the voice you wish to clone is not available, you can submit it yourself.
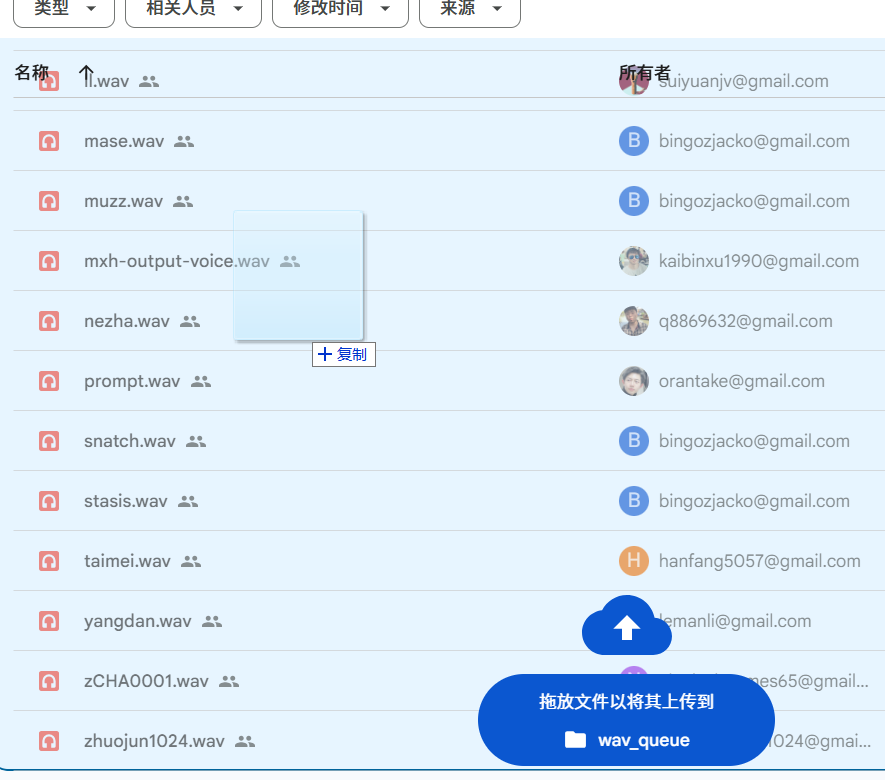
- First, convert the audio file of the voice you want to clone to WAV format. The duration should not exceed 24 seconds; 5-24 seconds is recommended.
- The audio content must be legal, not infringe copyright, have no background noise, be clearly pronounced, and feature a single speaker.
- Open this URL:
https://drive.google.com/drive/folders/1gCWL1y_2xu9nIFhUX_OW5MbcFuB7J5Cl, drag and drop your prepared WAV file inside, and wait for review and approval before it becomes usable.
After ByteDance's approval, they will create a corresponding
.npyfile with the same name. Both the.wavand.npyfiles will be placed in theuser_batch_1-3folder on the aforementionedlatentspage. You can then download this.wavfile and its corresponding.npyfile for cloning.