Ever been annoyed by background noise in your recordings? Last time, we introduced using a one-line ffmpeg command for denoising. While very simple, the results might not be ideal.
Today, we introduce a more professional and powerful denoising solution—using Alibaba DAMO Academy's AI model speech_zipenhancer_ans_multiloss_16k_base. Don't worry about complex environment setup or programming knowledge! You just need two small tools and a .py file to automatically complete all denoising work with a simple command.
Let's get started step by step!
Preparations (Skip if you already have uv and ffmpeg)
Before we start, we need to get two small tools: uv and ffmpeg. They are key to automatic configuration and audio/video processing.
Step 1: Get uv
uv is a lightweight Python package manager. It helps us automatically download and configure the various libraries required by the Alibaba denoising model, saving us the trouble of manual installation.
Download Link: For the Windows version
uv.exe, download from here:https://github.com/astral-sh/uv/releases/download/0.9.8/uv-x86_64-pc-windows-msvc.zipSteps:
Click the link above to download the zip file.
Extract the downloaded
uv-x86_64-pc-windows-msvc.zipfile. You will seeuv.exeand the other two.exefiles in the same directory.In the address bar of any folder on your computer (the place showing the file path, as shown in the image below), type
%userprofile%\.local\binand press Enter.
Copy and paste all three files extracted earlier (
uv.exe, etc.) into this newly opened folder.
Tip: Doing this allows your computer to directly recognize and run the
uvcommand from anywhere, without needing to specify its full path every time. Very convenient!On MacOS, simply execute
wget -qO- https://astral.sh/uv/install.sh | shto complete the installation in one step.
Step 2: Get ffmpeg
ffmpeg is a powerful audio/video processing tool. We'll use it to convert videos into the fixed audio format required by the denoising model.
Download Link: For Windows, download the full version of
ffmpegfrom here:https://www.gyan.dev/ffmpeg/builds/ffmpeg-release-full.7zOn MacOS, simply execute
brew install ffmpegto install in one step.Steps:
- Click the link above to download the
ffmpeg-release-full.7zarchive. - Extract the downloaded file. After extraction, you'll see a folder named
ffmpeg-x.x.x-full_build(x.x.xrepresents the version number). - Enter this folder, find the
binsubfolder, which contains anffmpeg.exefile. - Copy this
ffmpeg.exefile into the same directory where you placeduv.exeearlier (i.e., the%userprofile%\.local\binfolder).
- Click the link above to download the
Congratulations! The most troublesome part of the preparation is done. You only need to set up these two tools once, and they'll be ready for permanent use.
Save the Denoising Code to an ans.py File
All the denoising logic is contained in the code below. Copy and paste the code as follows.
- On your computer, choose a folder you like to store this denoising program (e.g., you can create a new folder named
aitoolson yourD:drive). - In this folder, create a new text file and name it
ans.py. * Important Note: Ensure the file extension is.py, not.txt! If you're unsure, in File Explorer, click the "View" tab and check "File name extensions". This will let you clearly see and modify file extensions. - Copy all the code below completely, then paste it into the
ans.pyfile you just created. - Save the
ans.pyfile.
# /// script
# requires-python = "==3.10.*"
# dependencies = [
#   "modelscope",
#   "datasets==3.0.*",
#   "torch",
#   "pillow",
#   "addict",
#   "simplejson",
#   "librosa",
#   "soundfile",
#   "sortedcontainers",
# ]
# [[tool.uv.index]]
# url = "https://pypi.tuna.tsinghua.edu.cn/simple"
# ///
print('Loading....')
import sys,subprocess,os,logging,warnings
warnings.filterwarnings("ignore", category=UserWarning)
os.environ['MODELSCOPE_LOG_LEVEL']=str(logging.ERROR)
from pathlib import Path
from modelscope.pipelines import pipeline
from modelscope.utils.constant import Tasks
if len(sys.argv) < 2:
    print("\n Error: Please provide the path to the audio or video file to process after the command!\nCorrect usage: uv run ans.py \"your_file_path\"\nTip: You can directly drag and drop the file into the command line window.");sys.exit(1)
ROOT = Path(os.getcwd());TMP_DIR = ROOT / "tmp";TMP_DIR.mkdir(exist_ok=True)
filepath = Path(sys.argv[1])
file_wav =  TMP_DIR/f"{filepath.stem}.wav"
out_wav =  ROOT/f"{filepath.stem}-ans.wav"
print(f'======Starting Denoising=======')
try:
    subprocess.run(  ["ffmpeg", "-y", "-i", str(filepath), "-c:a", "pcm_s16le", "-ac", "1", "-ar", "16000", str(file_wav)],  check=True,  capture_output=True, text=True )
except subprocess.CalledProcessError as e:
    print(f"\n Error: FFmpeg conversion failed! Please check if the file path is correct or if the file itself is damaged.\nFFmpeg error message: {e.stderr}");sys.exit(1)
ans = pipeline(Tasks.acoustic_noise_suppression, model='iic/speech_zipenhancer_ans_multiloss_16k_base', disable_update=True, disable_log=True)
ans( str(file_wav), output_path=str(out_wav))
Path(file_wav).unlink(missing_ok=True)
print(f'======Denoising Complete. Denoised file is: {out_wav}')Run the Denoising Program
Now it's time for our denoising program to shine!
- Open a Command Line Window: Navigate to the folder where you saved the
ans.pyfile (e.g.,D:\aitools). In the folder's address bar (the place showing the file path), clear the existing content, typecmd, and press Enter.
This quickly opens a command line window in the current folder.
Enter the Command: In the opened command line window, type the following command:
uv run ans.py(There's a space afterans.py!)Specify the File to Denoise: After
uv run ans.py, you need to tell the program which file needs denoising. You can choose one of the following two methods:- Method 1 (Recommended): Direct Drag-and-Drop. Simply drag and drop the audio or video file you want to denoise (e.g.,
my_noisy_recording.mp4) directly into the command line window. The file's full path will automatically appear after the command. - Method 2: Manually Enter the Path. Manually type the full path of the file. If the file path contains spaces, be sure to enclose the entire path in double quotes, e.g.:
uv run ans.py "D:\My Videos\noisy_recording.mp4".
- Method 1 (Recommended): Direct Drag-and-Drop. Simply drag and drop the audio or video file you want to denoise (e.g.,
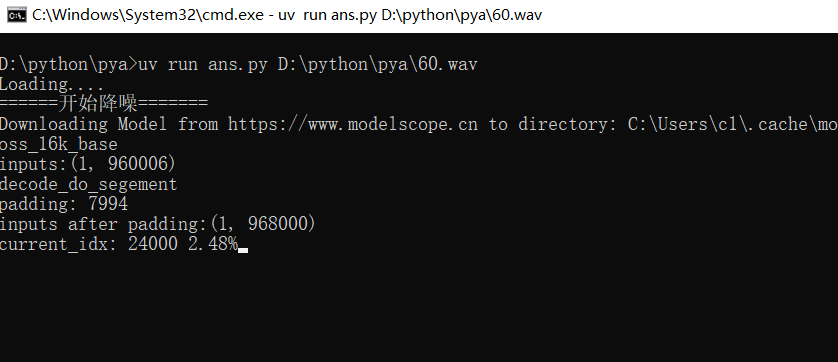
Execute the Command: After entering or dragging, press the Enter key, and the program will start running!
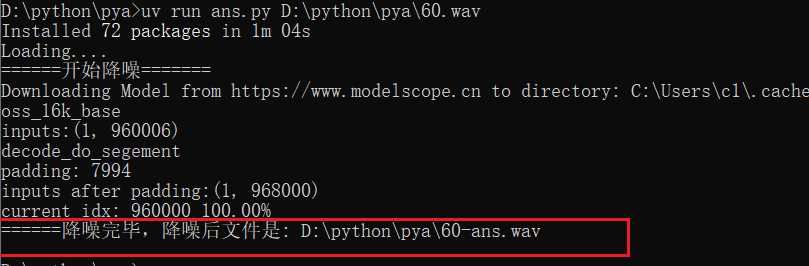
View the Denoising Result
After the program finishes running, you will find a new file named [your_original_filename]-ans.wav in the same folder as the ans.py file. This file is the denoised audio!
The first time you run the program,
uvwill automatically download and configure the various libraries and model files required by the Alibaba denoising model. This may take some time (depending on your network speed), so please be patient. Once downloaded, subsequent runs will be much faster!
What if %userprofile%.local\bin is not in the Environment Variables?
Click the "Start Menu" in the bottom left corner, find "Command Prompt", right-click --> More ---> Run as administrator. Paste this command and press Enter to execute.
reg add "HKCU\Environment" /v Path /t REG_EXPAND_SZ /d "%PATH%;%USERPROFILE%.local\bin" /f