v3.90 Update Log
Fixed Several Minor Issues
- Added a pre-warning for possible filename errors on Windows. Some download tools create filenames from YouTube that are illegal on Windows (e.g., containing characters like
? : ' <> | * /), which would cause an error in the final step of video translation. - GPT-SoVITS dubbing channel added clone voice feature: Note that subtitle duration should be between 3-10 seconds. Otherwise, the corresponding reference audio length does not meet GPT-SoVITS requirements, resulting in a 400 error.
- Removed Edge-TTS voices that are no longer supported.
- Changed video slow-motion and audio speed-up from multi-threading to multi-processing to improve processing speed.
Added Local Built-in Dubbing Channels: VITS-cnen and Piper-TTS
- VITS-cnen: Supports Chinese and English dubbing.
- Piper-TTS: Supports dubbing in 20 languages including Chinese and English. By default, only prompts to download Chinese and English voice models.
Added Languages and Voices for the Piper-TTS Channel
You can add the following language voices for this dubbing channel:
Arabic, Czech, German, French, Italian, Hebrew, Hindi, Indonesian, Hungarian, Polish, Portuguese, Spanish, Dutch, Turkish, Ukrainian, Vietnamese, Kazakh, Swedish
Only languages explicitly supported by the software can be added.
1. Open this website to preview a desired voice
https://rhasspy.github.io/piper-samples
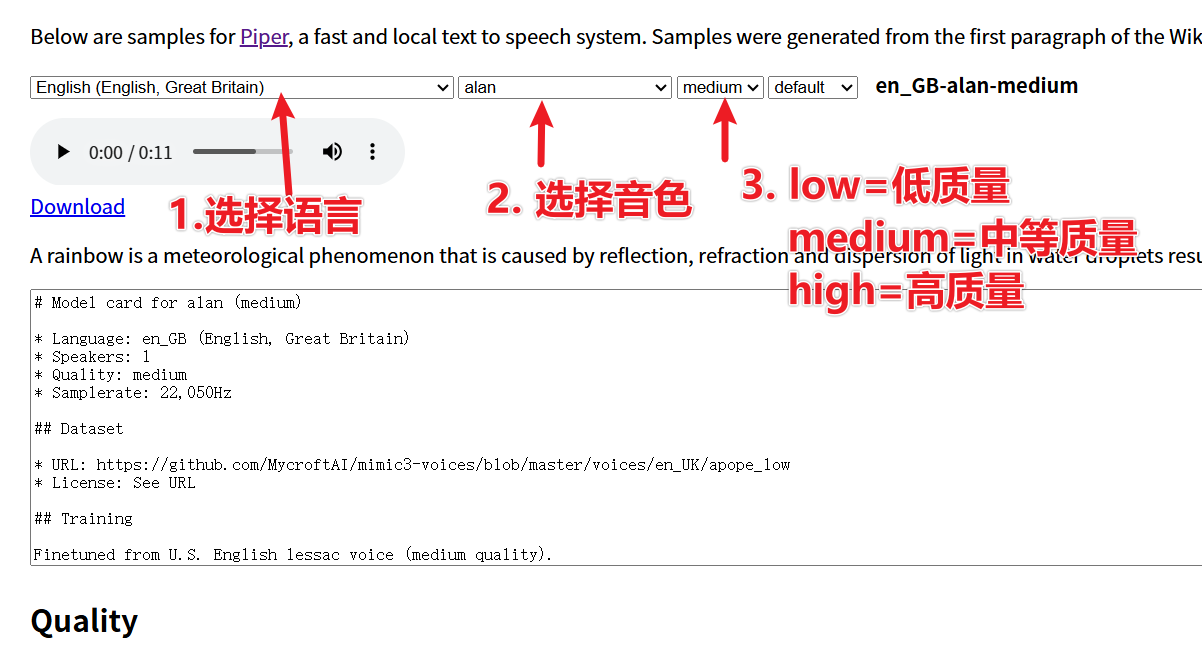
As shown, first select the language, then choose a voice, select the quality, click the player to preview. If satisfied, click Download to go to the model download page.
The last dropdown
Speaker/defaultdoes not need to be selected.
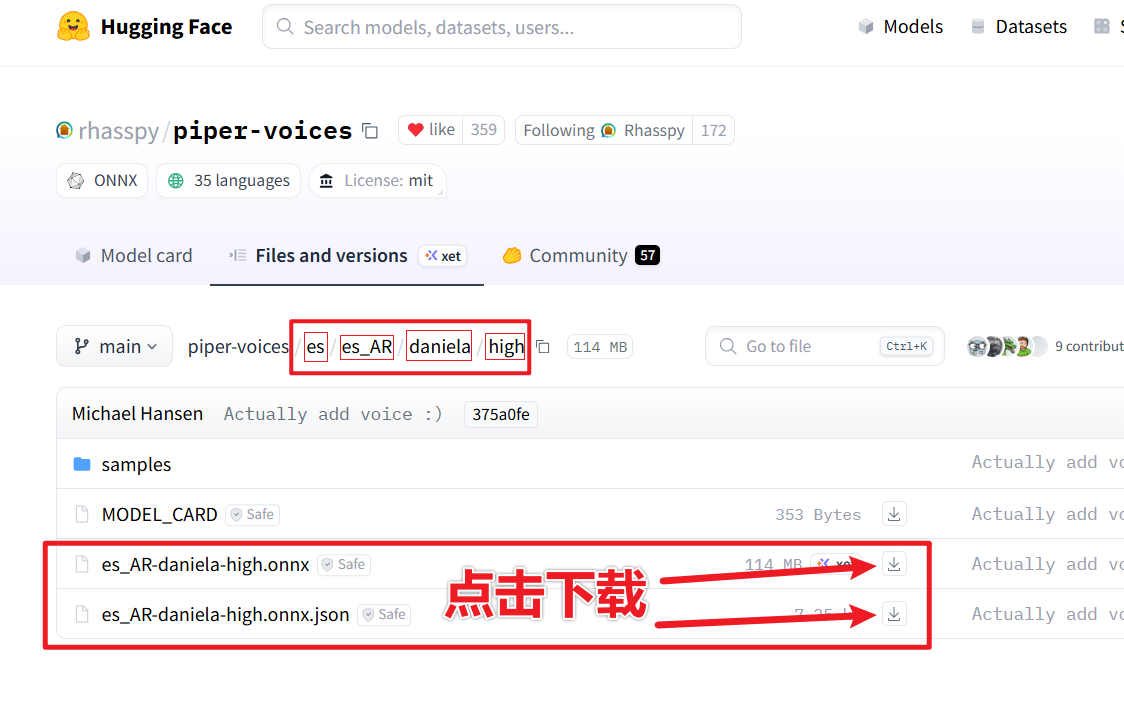
For example, I selected this Spanish voice:

Click the Download button to open the model download page. The displayed es_AR-daniela-high.onnx and es_AR-daniela-high.onnx.json are the two required model files. Only download these two. Also, note the four directory structures highlighted in red above, as shown below:
2. Copy the downloaded model files to the specified software location
After downloading these two files, they must be placed in the specified location for the software to recognize them.
First, open the models folder in the same directory as sp.exe (or sp.py for source code version). If a piper folder already exists inside, navigate into it. If it does not exist, create a new piper folder and navigate into it.
Then, inside the piper folder, create the same four-level directory structure as shown on the model download page, as shown below:
Inside the piper folder, create an es folder and navigate into it. Then create an es_AR folder and navigate into it. Continue by creating a daniela folder and navigating into it. Finally, create a high folder and navigate into it. Place the two downloaded model files into this high folder.
The correct placement should look like this:
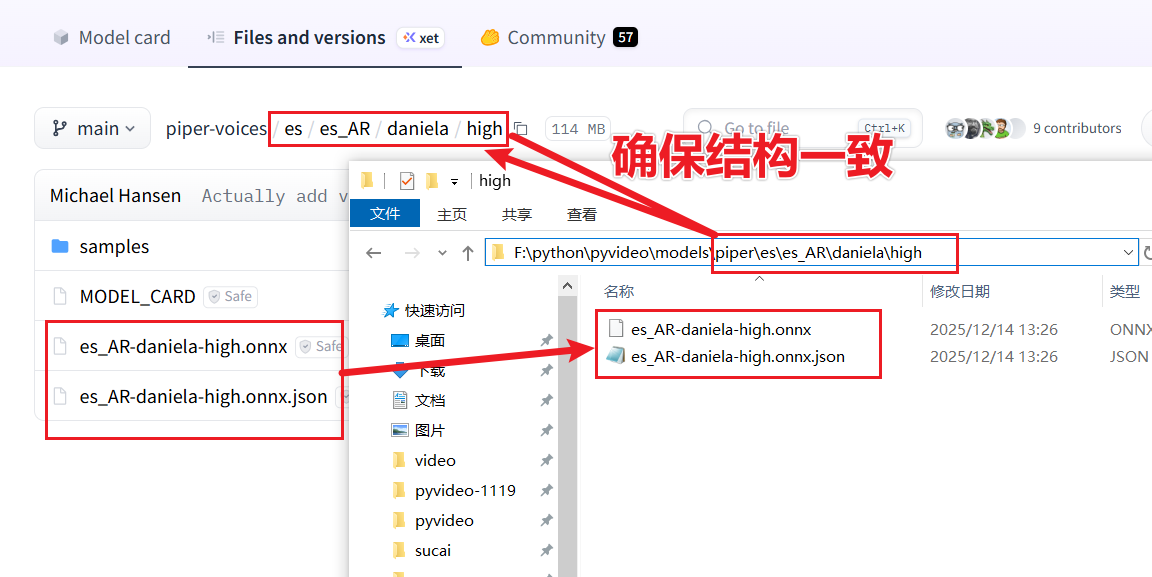
The directory structure may seem a bit complex, but this is a requirement of piper-tts. You must follow this strictly.
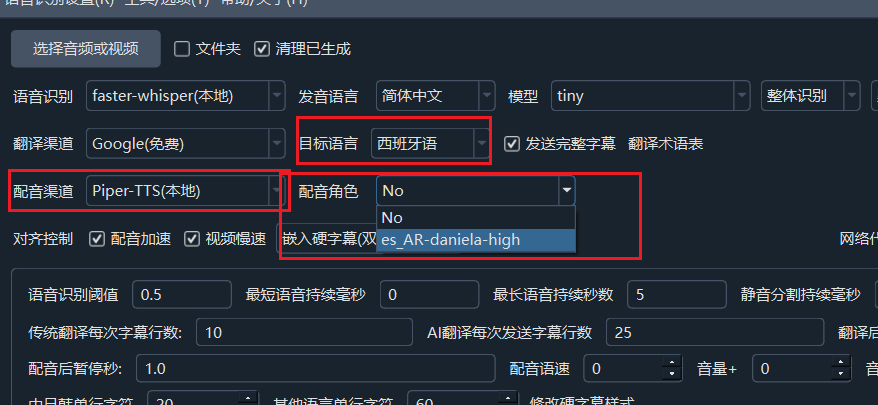
3. Delete the voice cache file in the software and restart to use
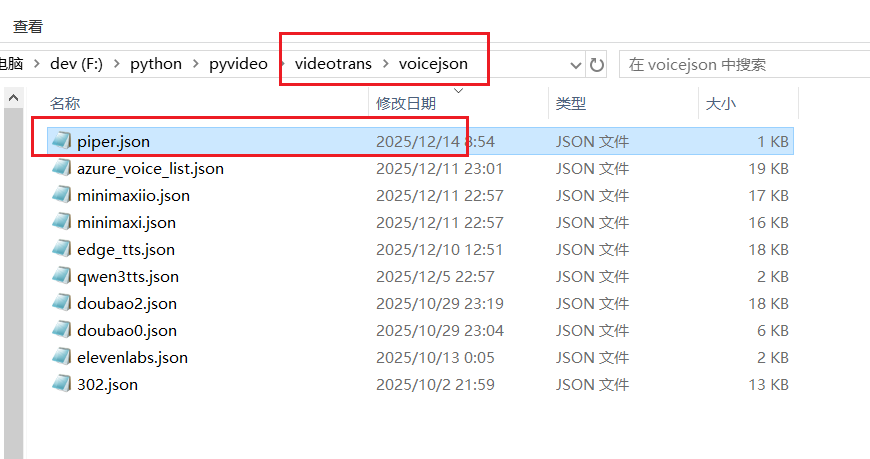
The newly added voice will not be visible in the software yet. You need to open the videotrans/voicejson folder in the same directory as sp.exe and delete the piper.json file. Note: delete only this file, do not delete other files.
Then close the software and restart it. Set the target language to the language of the newly added voice, and you will see the new voice available.